
There’s nothing like an assignment from a friend to challenge you to go where you have never been before, and this challenge came in the request of a Diaper Tower, or Diaper Cake, as I discovered was the correct name for it. It’s been forever since I have posted a blog – I started a new full-time job about 6 months ago, and I will admit that this position was totally different from anything I’d ever done before, so it’s been quite the learning curve. But one thing I have discovered is that without challenges, it is hard to grow and develop new skills and talents. Half the fun is just figuring it out…the first time…and then figuring out how to do it even better the second time around.
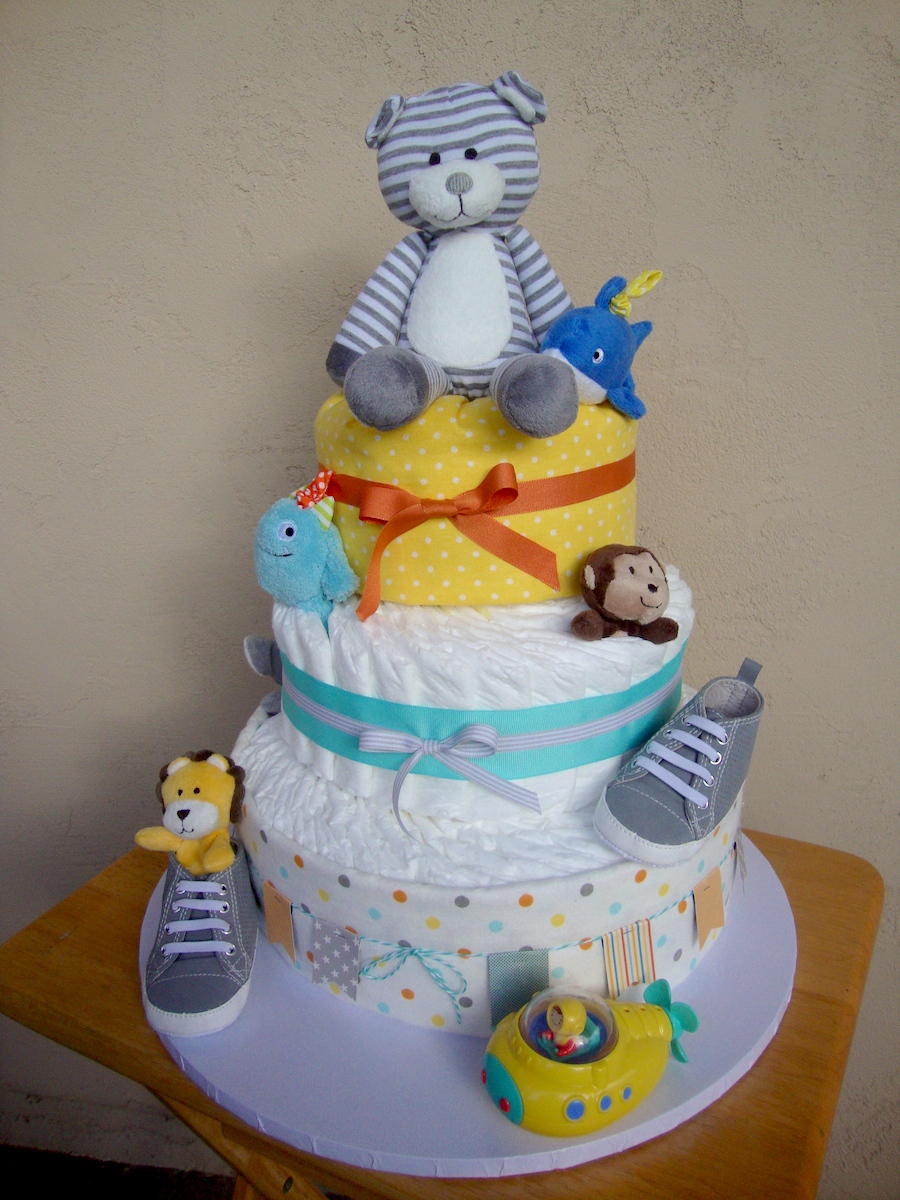
Diaper Cake
To make this diaper cake you will need:
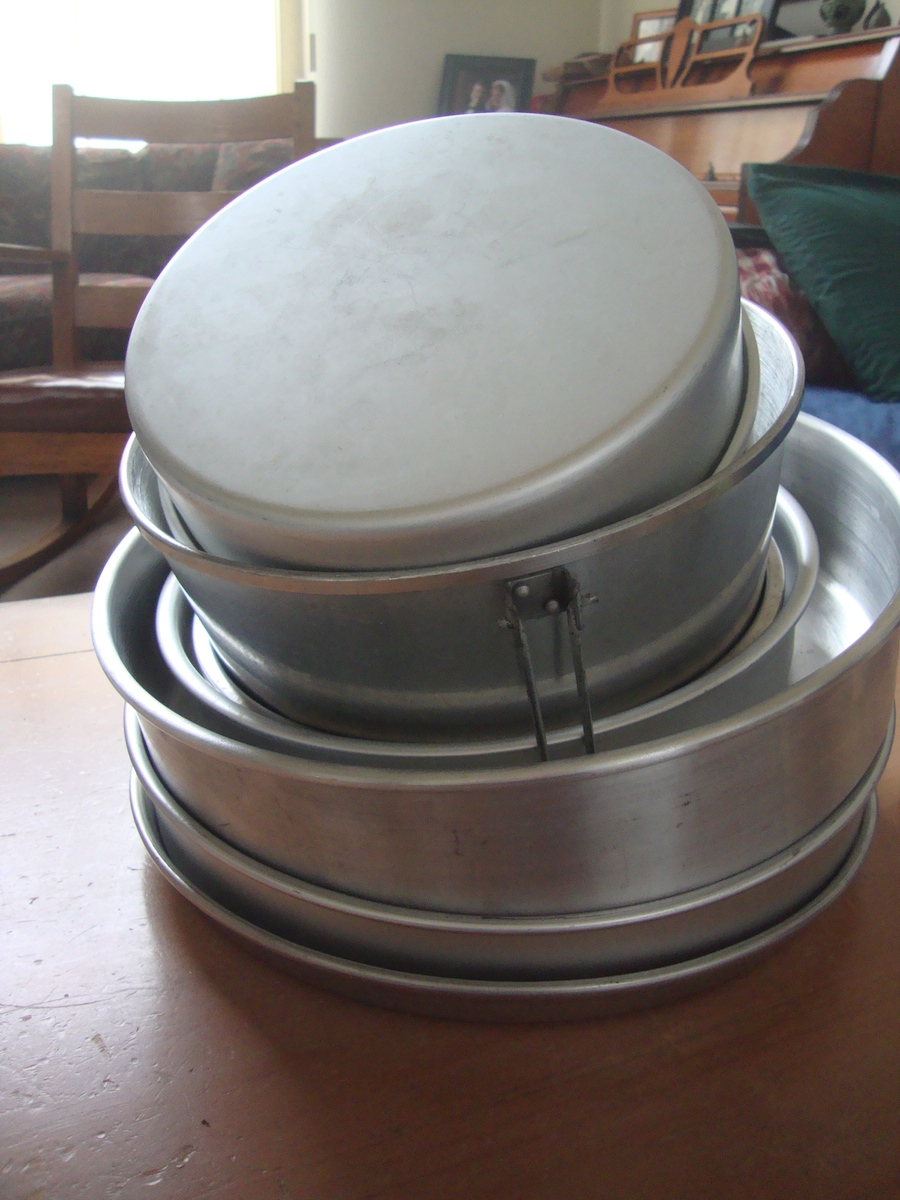
Assorted sizes of cake pans (to create the dimensions for the layers)
1 case Size 2 Pampers Swaddlers (I used 88 of the 96 diapers in the box.)
Cotton twine
1 – 16″ cake base (you can adjust this depending on the size cake you want to make)
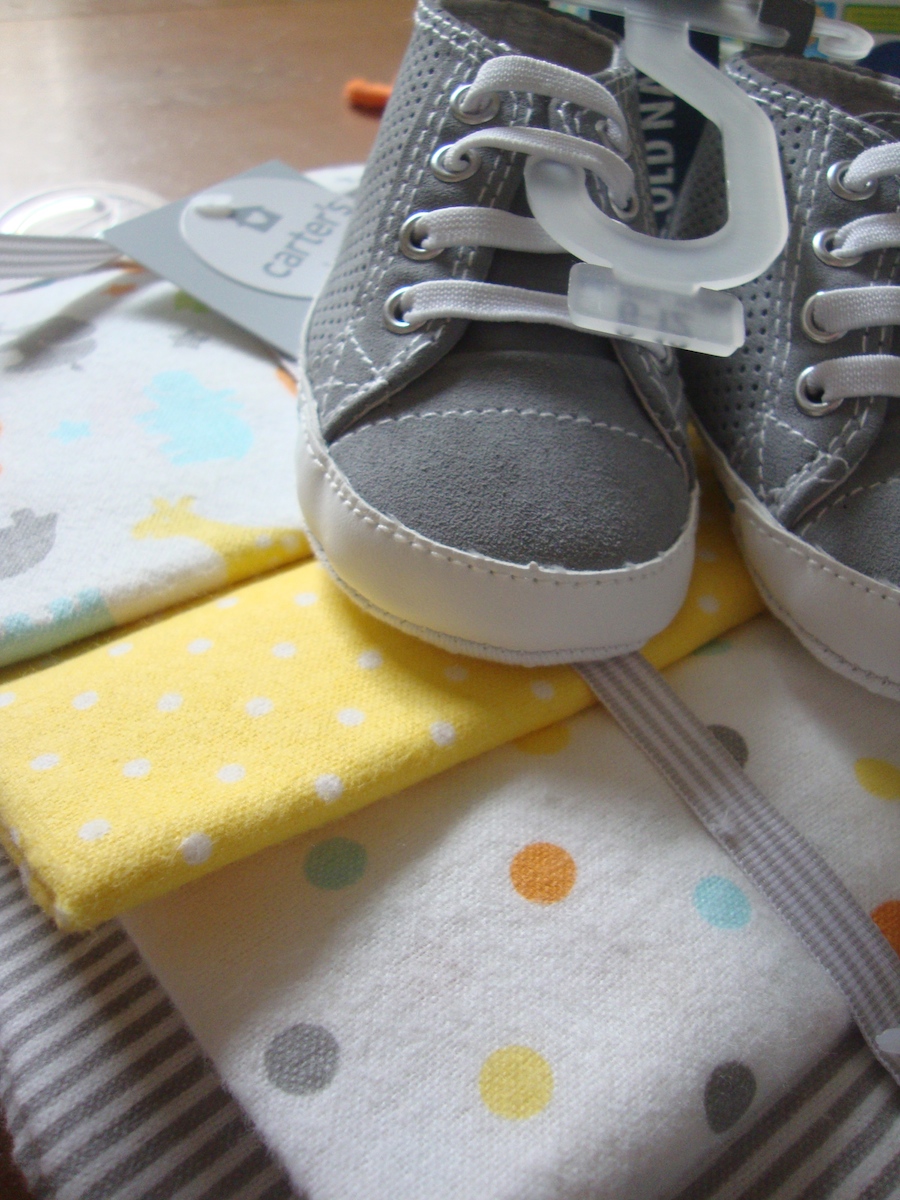
2 coordinating flannel receiving blankets
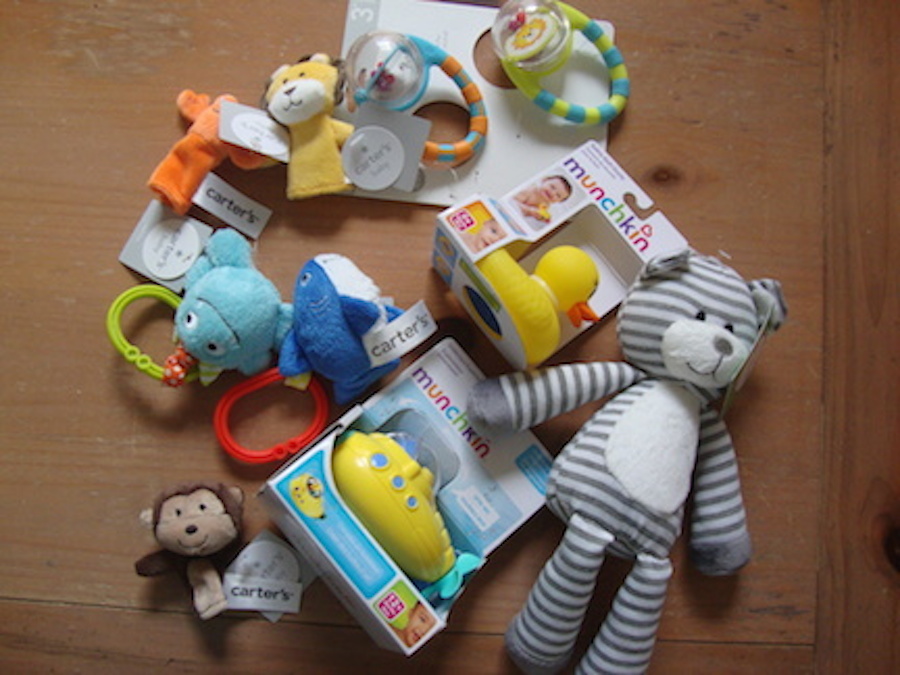
1 larger stuffed toy for the cake topper
Assorted toys for decorating the cake
Pair of baby shoes
Coordinating ribbon
Long straight pins, preferably with big heads…less likely to lose them
Needle and thread
Patterned cardstock
Baker’s twine
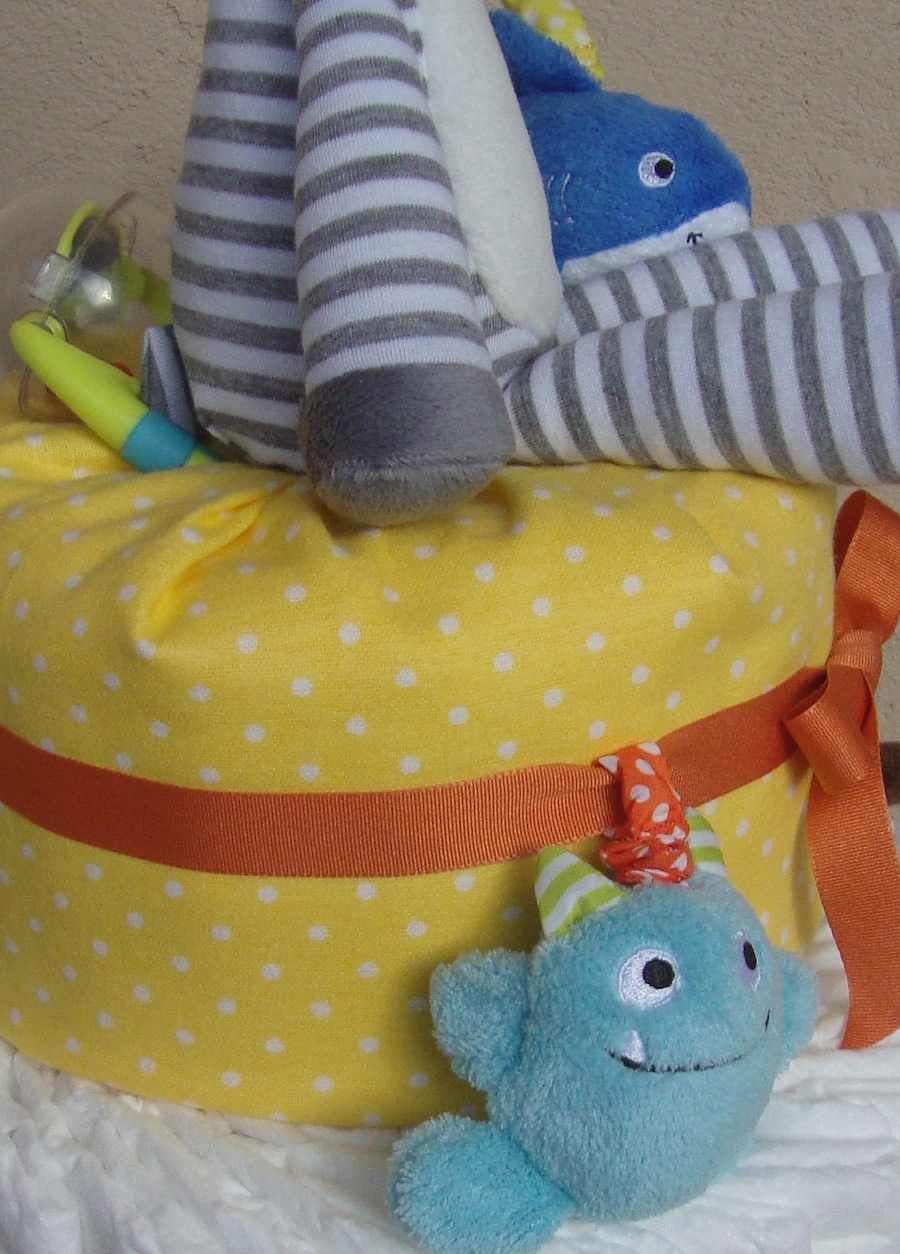
Part of what makes diaper cakes so much fun is choosing what you use for your embellishments. We tried to have a mix of soft and hard toys, keeping it color coordinated. We used MOST of these things, but not all…some things to save for the next time around.
Start with the pile of pans. I have a bunch of different sizes, so I pulled a bunch of them out. You can test the sizes by piling one on top of the other until you get a good variety of sizes. The pans with lower sides make it easier to tie up.
Use the pan to start shaping the layer. Spread the diapers slightly apart, curving the diaper around the outer edge of the cake pan.
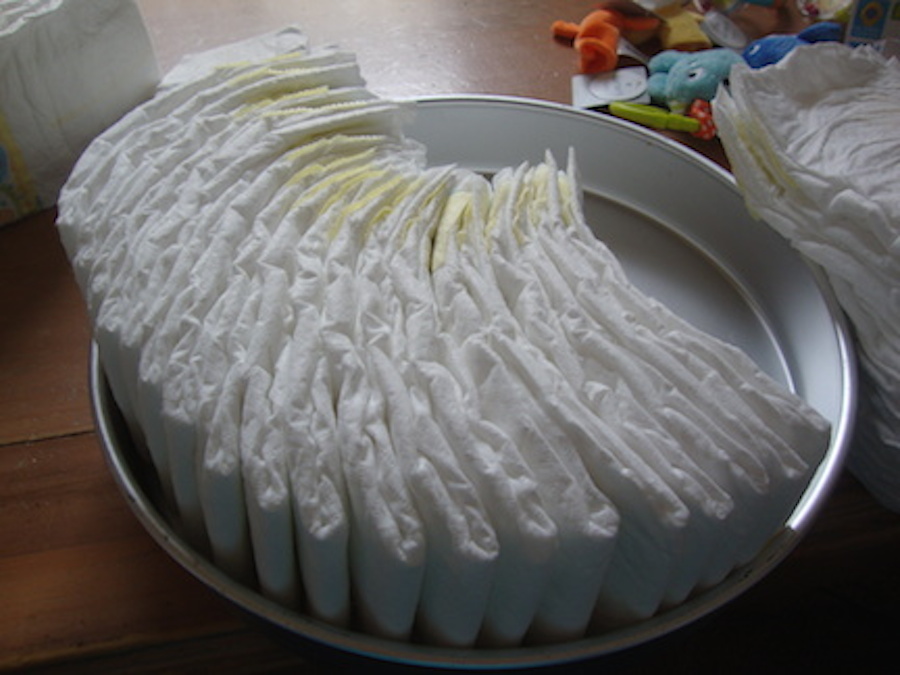
Continue until the diapers go all the way around the pan.
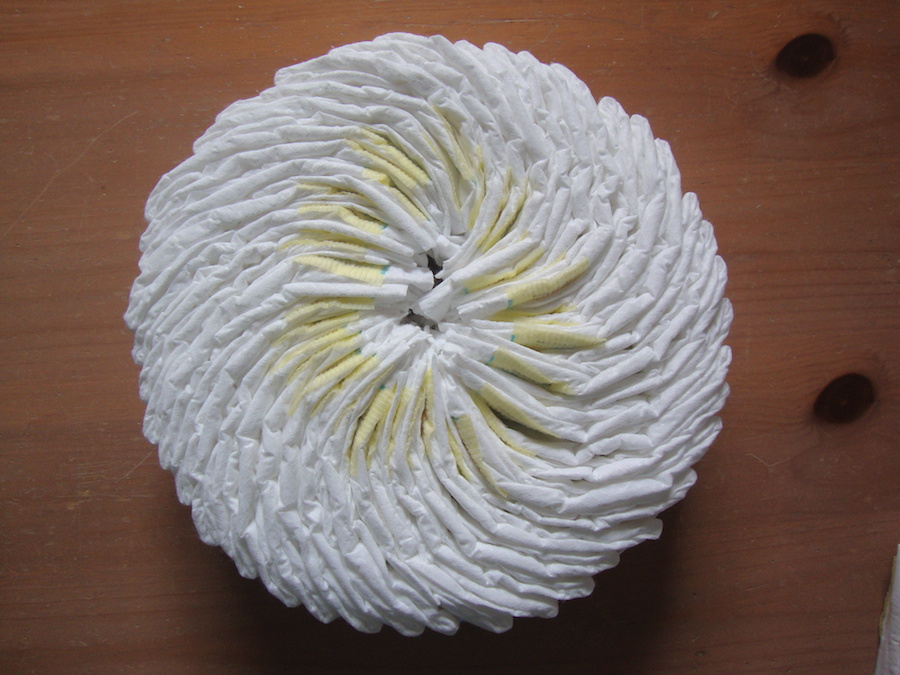
Start with the bottom layer. You can really pack the diapers in to create a solid layer. I have seen other diaper cakes where the diapers are much looser, but I wanted to pack as many of the diapers into the cake as I could…it made for a heavy, solid base.
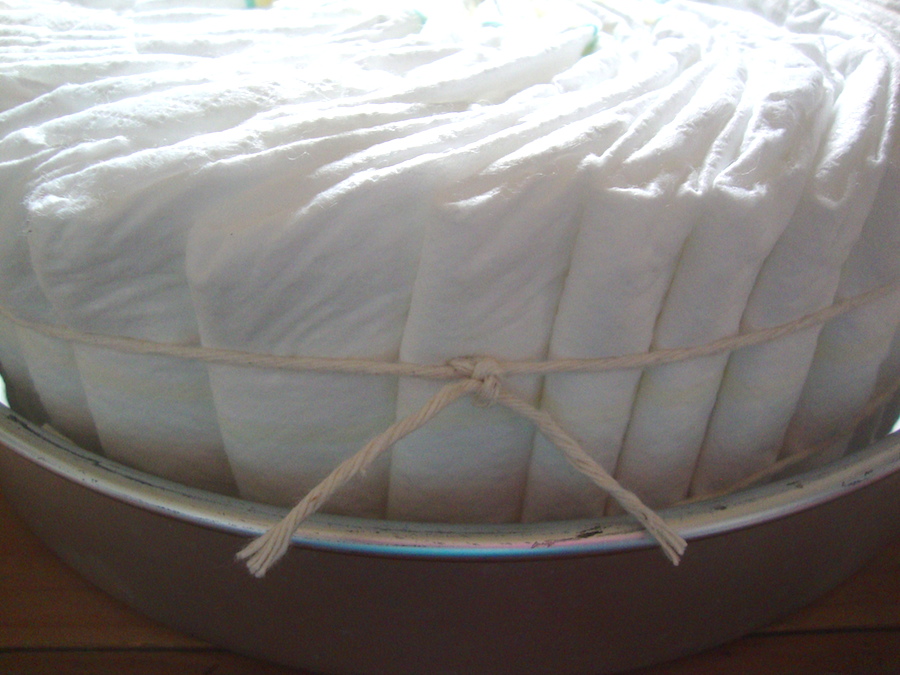
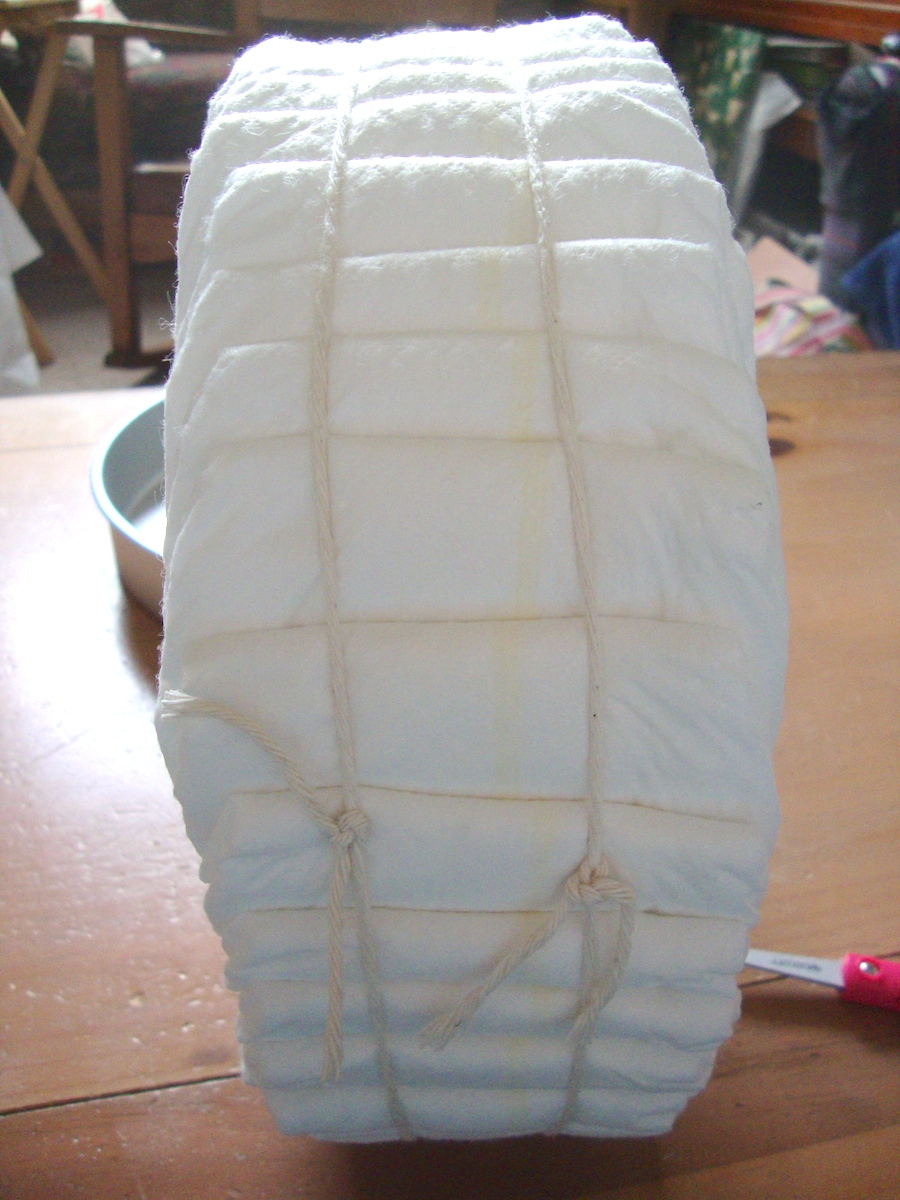
Tie twine around the middle of the layer of the diapers. For added strength, tie around another length of twine. Center the two rows of twine around the layer of diapers. For the middle section, you can move the two rows of twine a little closer, depending on the width of the ribbon you are going to use. Trim the tails off a little and tuck the loose ends in between the diapers.
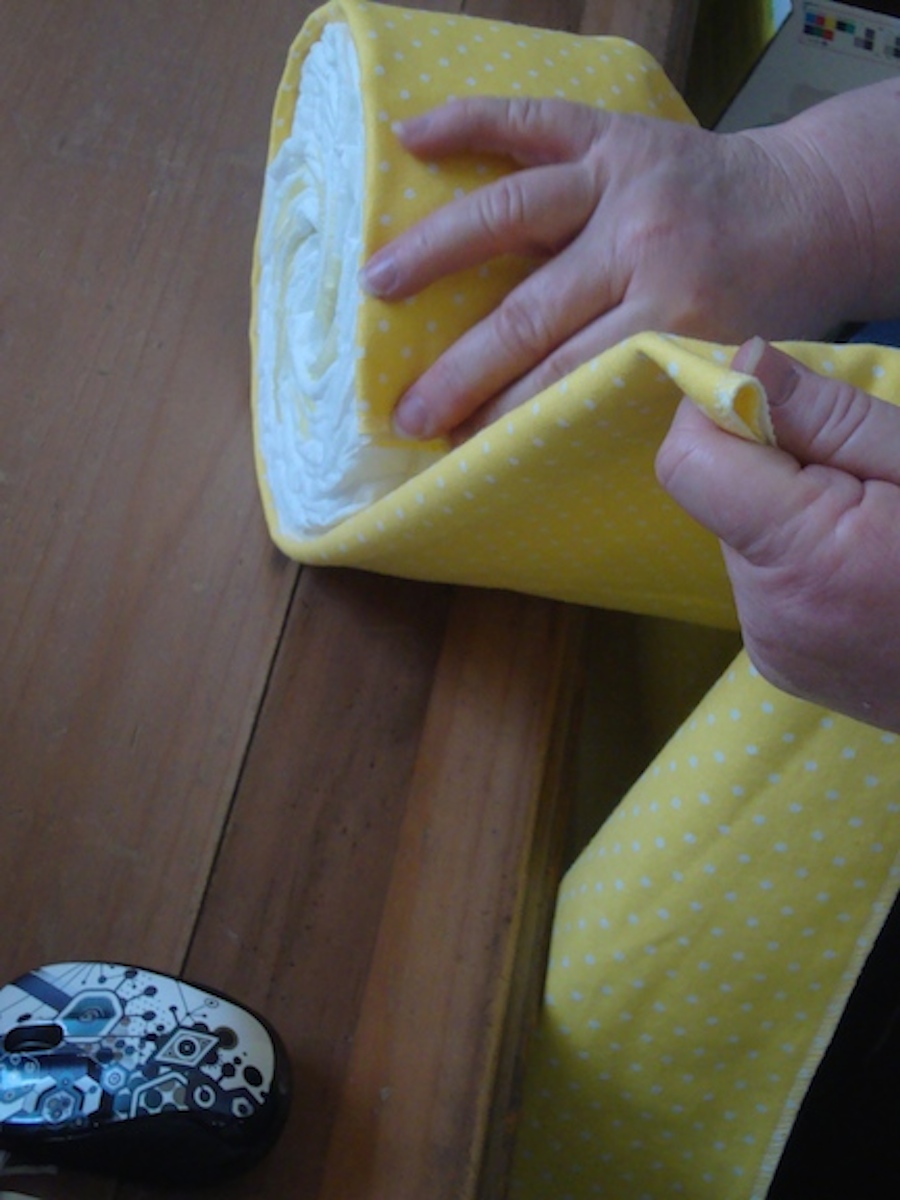
For the bottom layer, I folded the blanket so there were no raw edges exposed and the height of the blanket equalled the height of the diaper layer. Wrap the blanket around the diapers and try to pin it so the pins don’t show. My bottom layer was pretty big around, so the blanket didn’t quite fit. So I put the diapers back into the pan, un-did the twine, took a few diapers out and re-tied the twine tightly. (It’s all about experimenting to get it right!) After I readjusted the bottom layer size, the blanket fit all the way around the diapers.
Complete the other two layers. I have seen it where either all the diaper layers were exposed or they were all covered…I wanted enough of the diapers to show so that you could tell what it was, but I wanted the benefit of the colors/patterns of the receiving blankets, so I used blankets for the top and bottom layers. It made the layers pop.

When working on the top layer, I did it a little differently. I folded about a third of the blanket in a row, wrapped the blanket around the diaper layer, pinned the sides and then took the remainder of the blanket through the middle of the top layer…all the way down to the bottom.

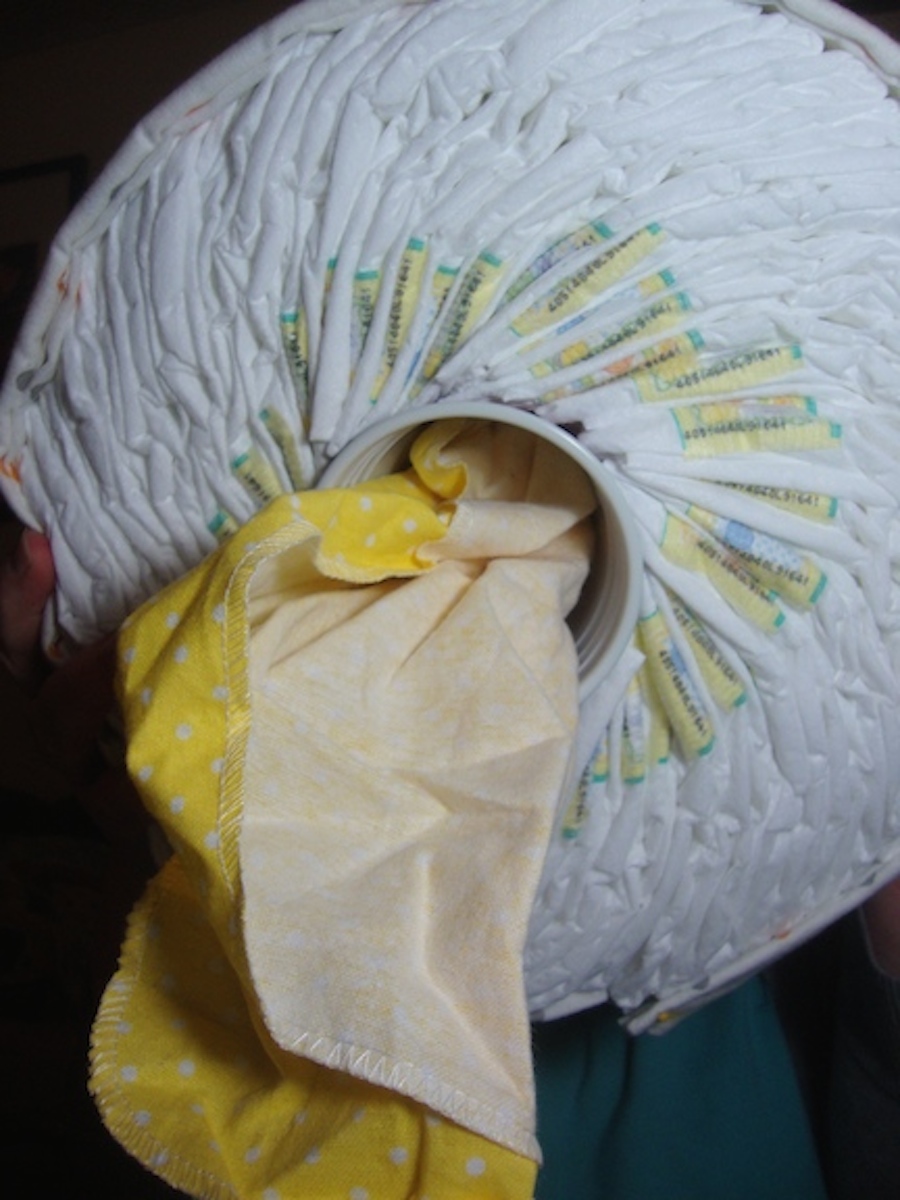
I inserted a plastic cup (cut off the bottom of the cup) to stabilize the center and give something for the blankets to go down through.
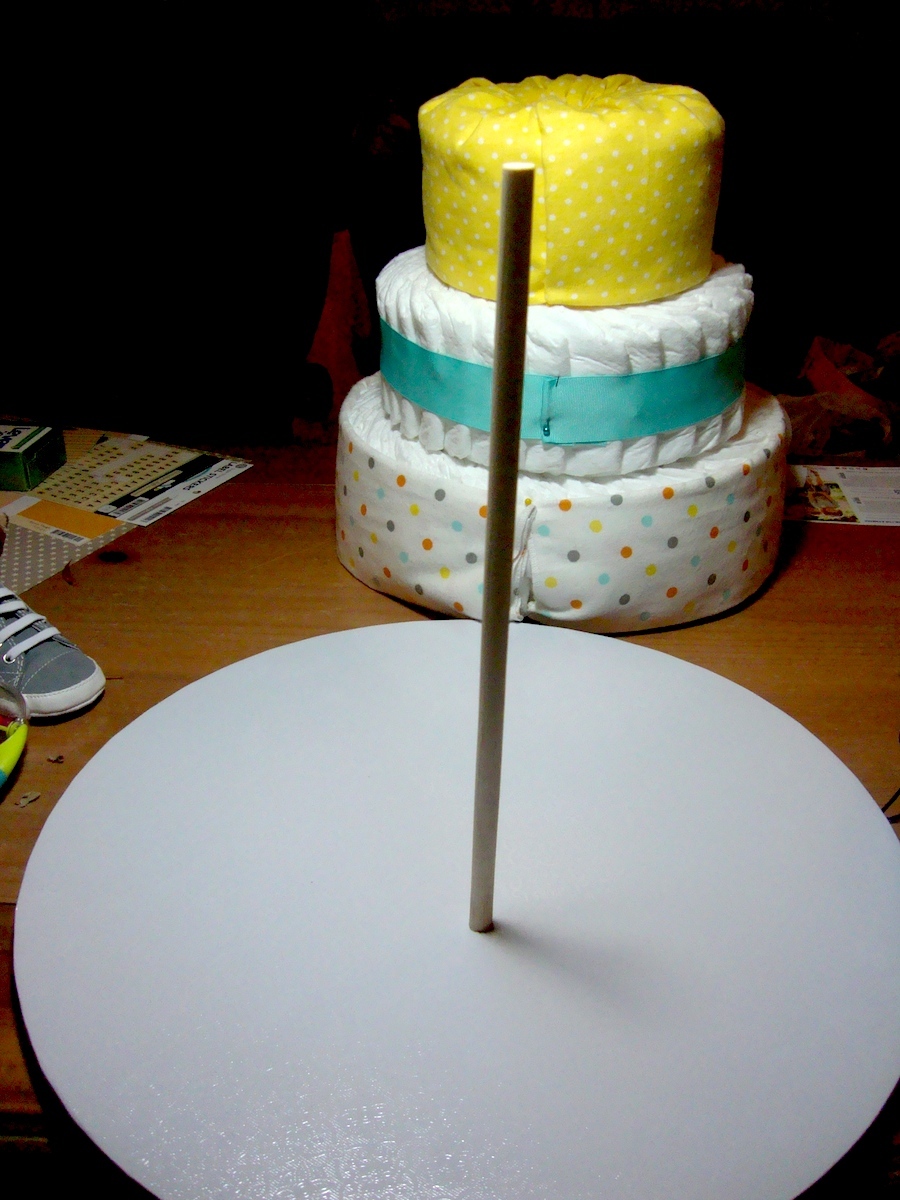
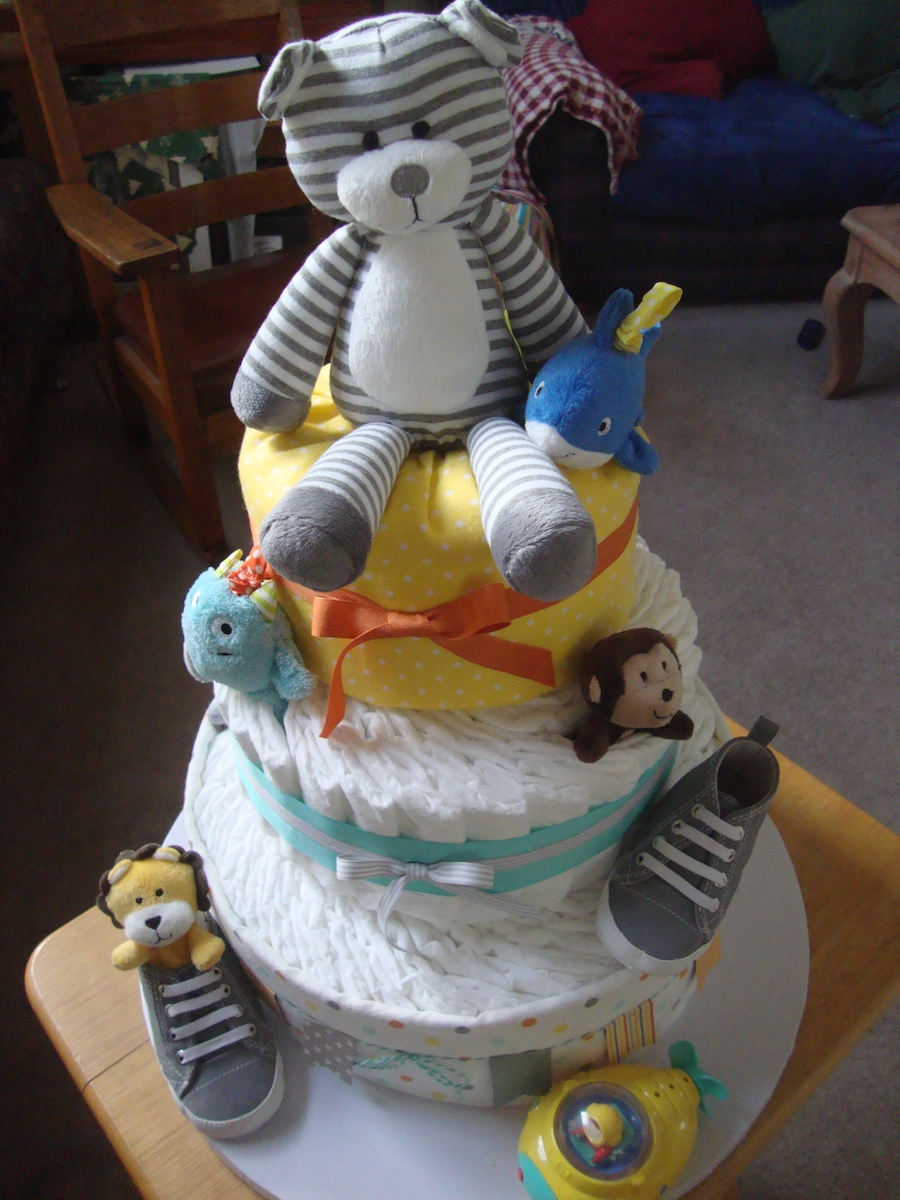
Determine where you want to place the cake on the board. Since I had the pair of shoes, I wanted more space, so I pushed the bottom layer more to one edge, which gave me more space on the bottom in front of the cake. I got it where I wanted it, then stuck the dowel down through the center of the cake to mark the bottom of the cake base. Remove the cake layers, poke a hole into the base, but not all the way through. Add a little hot glue to the hole, insert the dowel and let it set.
You can now stack the layers on the dowel. It was a lot of fun trying to figure out how to attach all the elements. Mostly things were pinned down discreetly with extra long, large head pins. But there were a few tricky items, like the submarine. I didn’t have long enough pins, but I did figure out how to take an extra long needle with some Perle Coton and tie it down through the cake base.
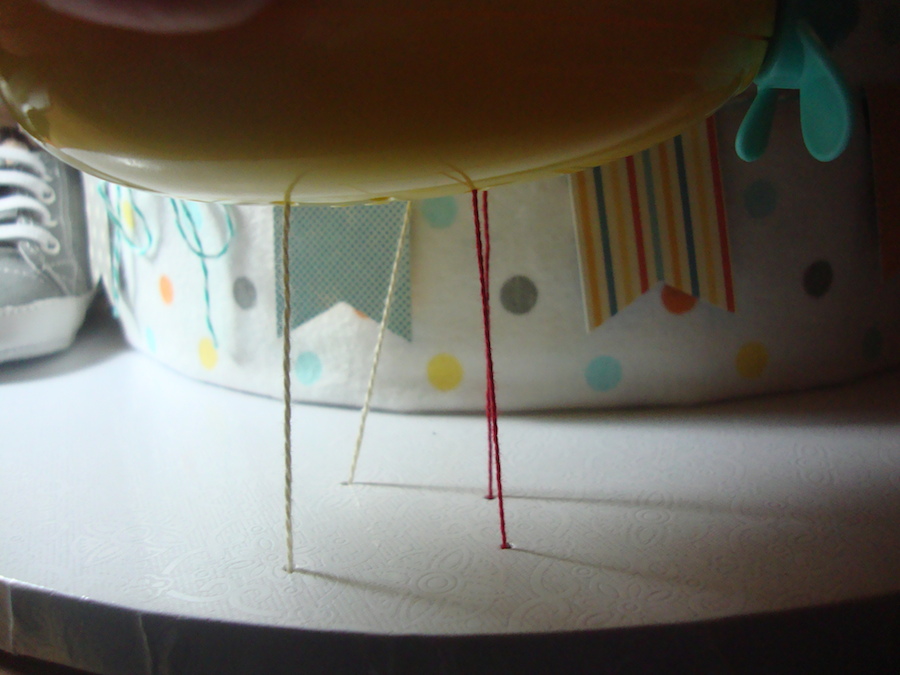
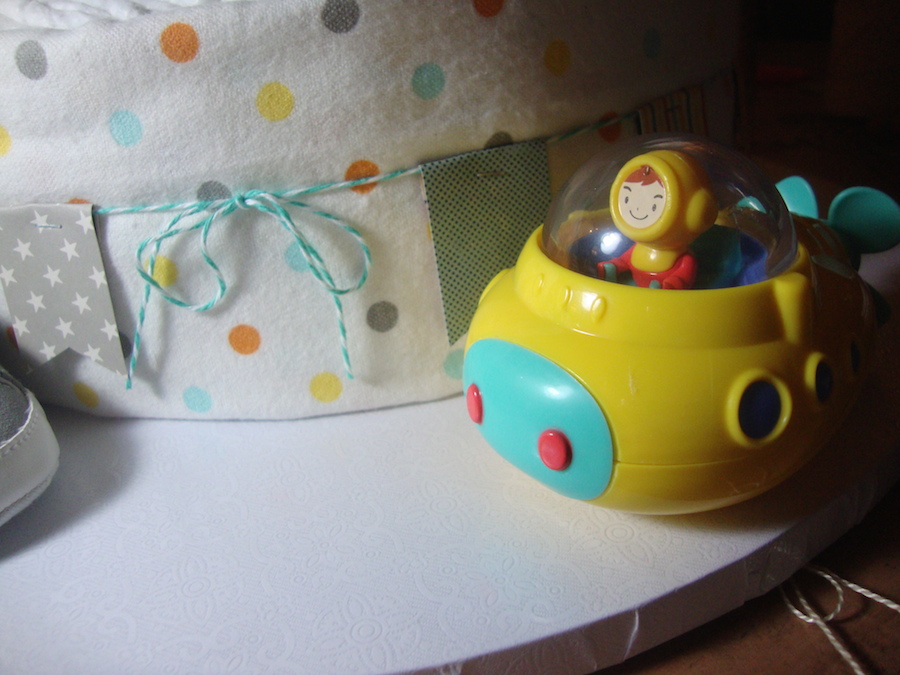
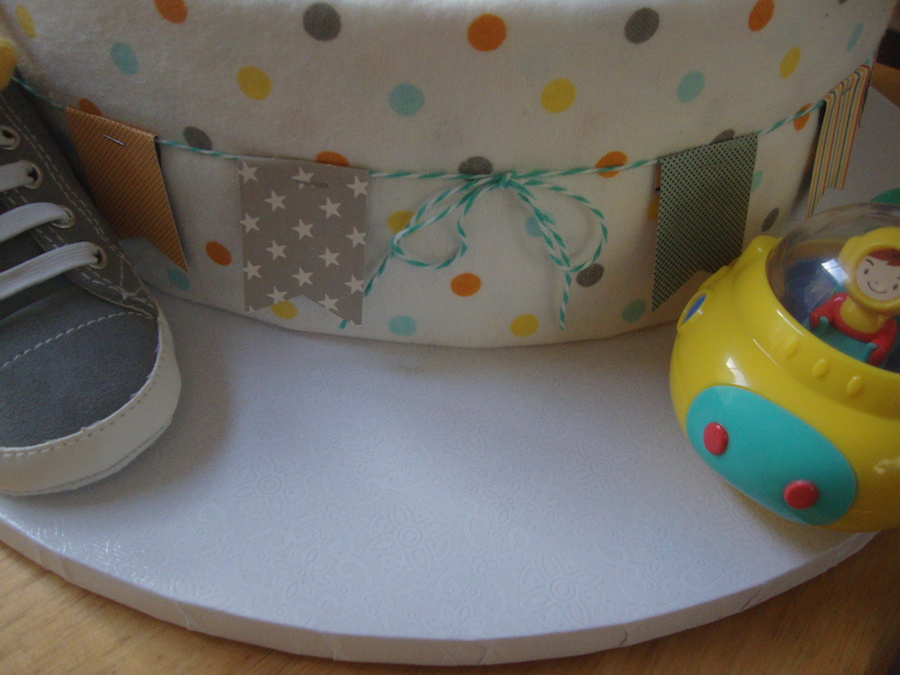
Pull the Perle Coton down tightly and tie it underneath the cake base. The bottom layer wasn’t quite decorated enough, so I made a little paper banner tied around the bottom layer.

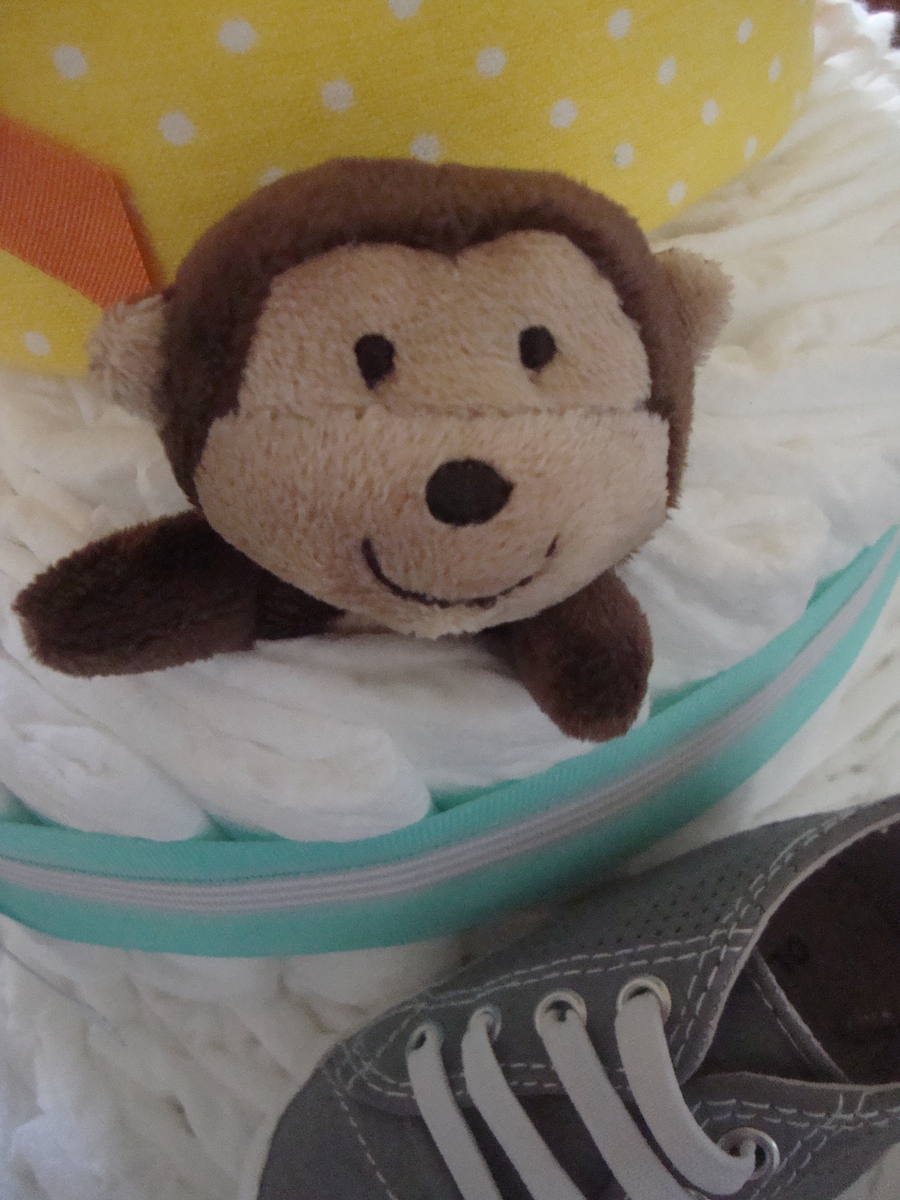
The bear topper needed a little boost, so I tucked the rattle behind to give it some support. A few stitches through the receiving blanket into the bear with a single tie-off holds it firmly in place. Tuck the finger puppets in between the diapers…
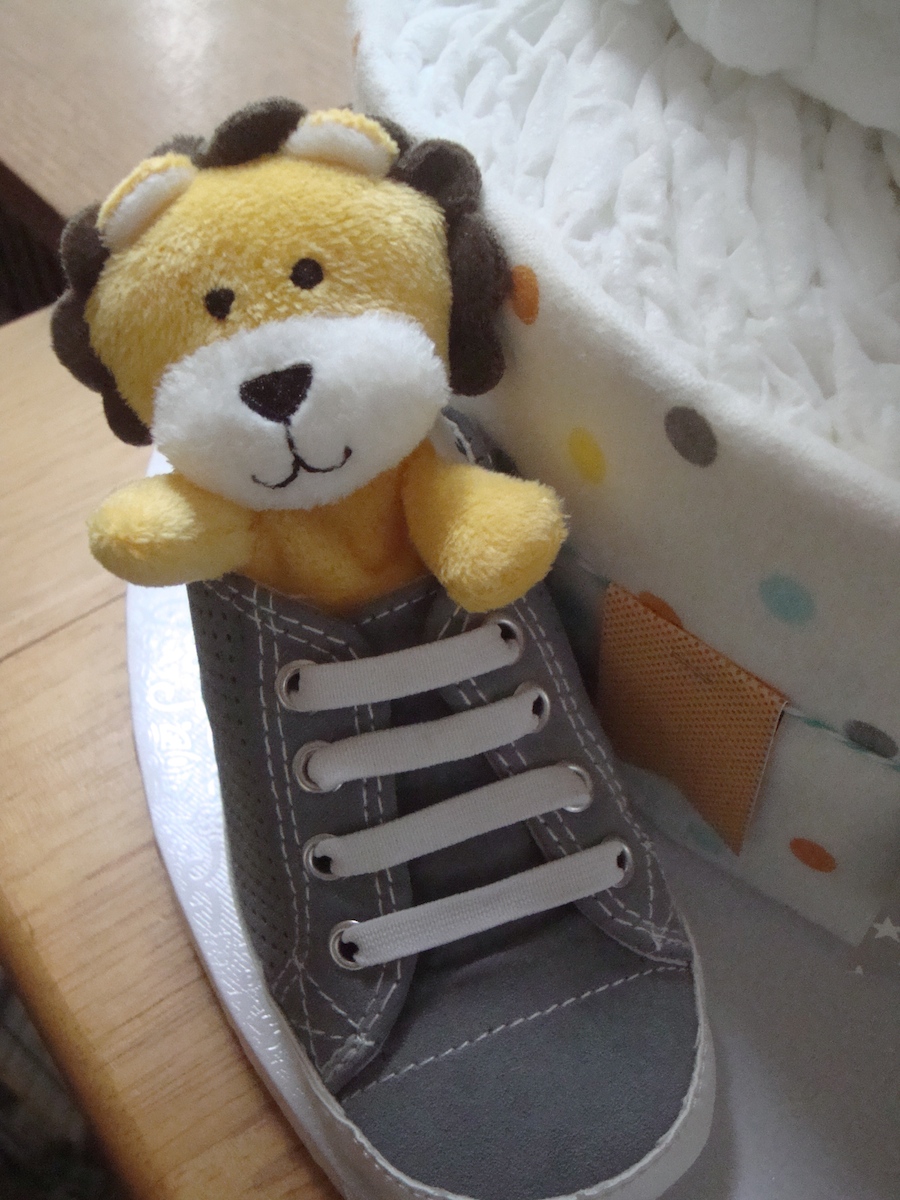
and inside the shoes.
And on the ribbon…use every opportunity to attach wherever desired.
This was a fun, slightly challenging project, with great results. The feedback I got from my friend was that everyone LOVED it and they were trying to think of anyone they knew that was having a baby so they could order one. I can’t wait to do one for a baby girl…just imagine it with flowers and bows…and all in pink!


