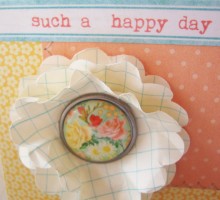
Yesterday’s post was full of fun with My Mind’s Eye, Miss Caroline, the Howdy Doody line, a link to the Matilde free font download, along with a Matilde Sentiments and Bubbles pdf for you to print and use. But there are lots more ideas for this fun line! On this card I combined a little stitching with a flower made out of a sheet of vintage graph paper. Did you notice? The center brad is out of my favorite paper design from the line. Love the crumpled flower and it is so easy! The flower (scalloped circle) punch is from EK Success. Speaking of flowers… The punches are: Scalloped flower/round – EK Success; Sunburst – Martha Stewart; twine – The Twinery. The buttons are from my big old random button jars…I’ll have to share a picture of those with you someday. I had a bunch of scraps of ribbon that go perfectly with the projects – I love using up scraps! The ribbon is from May Arts, with a little Glimmer Mist Spray. The alphabet stamp is from Limited Edition Rubberstamps and the label stamp is from PaperTrey Ink; the ink is Fluid Chalk from ColorBox. Here is the last card for today – There it is…my favorite paper from the show! I can hardly wait until I find just the right pictures to use the full 12″ X 12″ sheets of patterned paper for some layouts – but
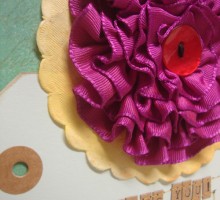
Mini Monday at Midnight...almost! These cards are starting to pile up!
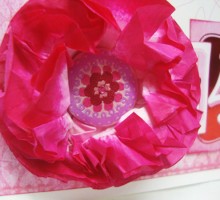
Not your ordinary store-bought box of Valentine's!
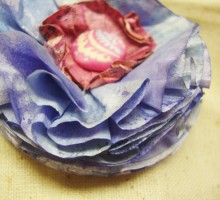
And I’m going to show you how to make them. I have been promising this for ages, but the truth is that I have had and CONTINUE to have…technical difficulties! This video tutorial is far from perfect, but it will have to do for now! For anyone that I have showed before, I have reduced the count from 16 papers to 12…it’s a little less bulky, but beautiful still. If you want a super full flower, keep to 16 papers! Here are a few more flowers/views. I will show more steps for variations in the next few days! Isn’t the variegated color wonderful? I love how spraying the two shades of color over each other makes such a spectacular hue. This last flower was made from yellow baking cup liners and sprayed after constructed and “fluffed”. I love this, too! I have to say it once again…I love these flowers! Have fun and let me know if you have any questions. I’d love to hear from you!
I have to say that sometimes I get really frustrated with myself when I make dumb mistakes. What makes me even MADDER is when I can’t figure out what I did wrong…mad or crazy, which can be synonymous. So I typed out almost an entire post, including photos, had to leave for a few minutes, which turned into a few hours and when I came back…I couldn’t find it. And the title was out of my head…which had been super cute. Then I remembered that I had centered the whole blog around the word “cute”…beats me if I can remember a single sentence. But it’s been a long week and I’m only to Wednesday and I need to move on to the next task at hand…or at least to attack the list. Last week I got a wonderful box full of Cosmo Cricket’s new line, DeLovely, in the mail. I love the brilliant colors – the shades of green, turquoise, yellow and bright pink are some of my favorites colors ever and the combinations make me happy. Anyway, last week was crazy busy and I had to set the box aside for a few days. Once I got to it, I sure had fun. Hopefully I will get to play more with it tomorrow! I like to think of card making as warm-ups to my “creative exercise”. I will frequently start
I don't know how it happened, but I've lost a whole 'nother week! I don't dare plan out the entire week…too much comes up and I need to make sure that I don't get too behind by scheduling too much. But I still can't believe how time flies by. My Mom warned me about this. It's definitely no major revelation, but every once in a while it just seems to smack me in the face…not in a painful kind of way, but it helps keep me humble and grateful that I got as much done as I did and it inspires me to be careful how I use my time. I had so much fun over the long weekend. I worked at the Pinecone Press booth on Friday at the Scrapbook Expo in Del Mar, CA and then taught a make and take at Cool Scrapbook Stuff in Poway…how to make those fabulous flowers. I haven't taught for a while and I'm out of practice, but I think that the ladies had a good time, even though we were outside and the breeze was blowing our papers away. I now have an even better collection of colors of Glimmer Mist and can't wait to expand my finished flower color list. I will have to post them again when I get more done. It's my new "addiction", but I'm very good about
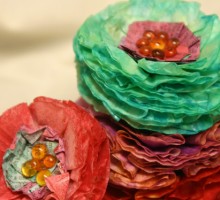
You can whip up some of these beauties with no watering required!
Spring is here! Bouquets of flowers are always welcome at my house, but if a trip to the store is not in my time schedule or budget, I'll just make a few of my own! Not that I need spring as an excuse for making flowers! They're never as wonderful as the real thing, mostly because they have no fragrance and I'm not as patient with the intricacies, but I sure love making them. These sweet little flowers remind me of Bachelor Buttons. Making one layer is great for scrapbooking or card making, but for a more dimensional project, making two and putting them back to back will do the trick. The first couple took a while to make, working out the steps, but once that was mastered, just a few minutes will do. You can get the directions here. Just imagine how cute these would look on a card or a scrapbook page…okay, if I didn't have to bake for the Senior Bake Sale, clean house, prepare for a wedding, 3 baptisms and a reception, not to mention out-of-town company, maybe I'd do that right now. As it stands, I'll just have to wait until next week…oh wait! Next week I'm working on cleaning my workroom. Great! It will be summer before I get back to these! Well, we shall see!&#