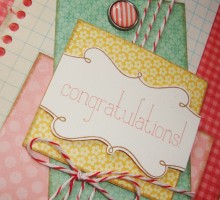
I brought home some of My Mind’s Eye Miss Caroline, the Howdy Doody collection, from CHA a couple of months ago. I have been dying to play with the line, but have been distracted by other projects that, once completed, served another purpose…like the Technicolor Deviled Eggs (for the boy’s Risk party), Jello Cookies (for a fireside) and the Cake Batter Krispie Treats (for a school bake sale). I can always use cards, but I’ve gotten quite a stash right now, so I was putting it off. Cards are about the only thing that I have room to make right now. But when I realized that I had found one of the fonts that My Mind’s Eye used on the packaging and for the embellishments, I couldn’t resist playing any longer! Don’t worry…I’ll share! Again, I am revisiting the 6″ X 6″ patterned paper pad…my favorite for making cards! I really loved the Howdy Doody line, partly because of the warm color, but mostly because of this… I do believe that this was my favorite patterned paper at the whole show! Please, don’t anyone take offense – there were dozens of collections that I will be more than happy to play with. But this one was especially appealing. Who can explain what makes you love a design? I don’t know for sure. Maybe it’s the flowers, maybe it’s the colors…whatever it is, this is so
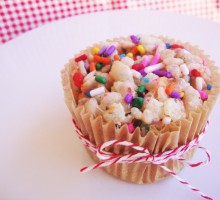
I’ll have to say that I don’t usually try a recipe as soon as I find one, but I was baking things for the school play treat table and came across this recipe. It sounded easy and yummy…and cute! I found the recipe here. Cake Batter Krispie Treats 3 Tablespoons butter 1 – 10 oz. bag miniature marshmallows 1/3 cup white cake mix – not prepared, just the dry mix 1 – 1.5 oz. container of sprinkles (Jimmies) – these are mixed colors, but you could use what ever kind you like 6 cups Rice Krispies Put parchment paper inside a 9″ x 13″ pan; set aside. Melt the butter in a 3 qt saucepan over medium heat; add marshmallows and stir, coating with the butter, until completely melted. Add the cake mix, a spoonful at a time, mixing well. Don’t overheat. Pour over the Krispies, and stir in about half the Jimmies; mix well. Press into the pan, sprinkling the rest of the Jimmies over the top. I butter my hands a little and then it won’t stick on my hands as I press the treats into the pan. I wanted the Krispie Treats to be tall, so I pressed it into just half the pan…you could use a smaller pan, if you like. When I’m doing something for a bake sale, I like to make the presentation nice. Taste is important, but
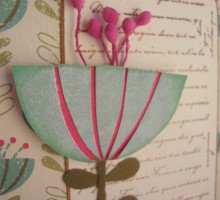
At CHA this January, I wandered into the Little Yellow Bicycle booth and caught a glimpse of their new line, Paradise…loved it! Then I got my hands on some…love it even more! Love the colors, love the texture and I really love the flower. It is always fun to have new product to play with, and I love the embellishments that are part of the Paradise line-up. I know how to make a pleated flower from scratch, but it is so easy to make one using LYB Paper Flower Kit, like the one on the above card. I also really like the embossed stickers, especially the words that are great to use on cards and layouts. Then of course, I needed to make my own flower that goes along with the line! I really do love the flower! There are some really cute chipboard die-cuts that I have around here somewhere, but I am getting ready for a scrapbooking garage sale and I seem to have misplaced them. I have layouts that are almost done…will post those another day!
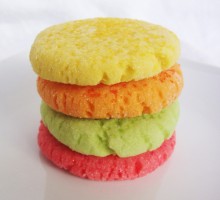
Light and fruity, these cookies are sure to bring a smile!
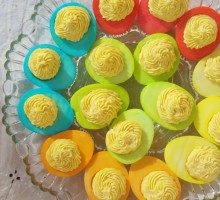
Updated information at the end of the post…in answer to a comment! If you are a “board member” on Pinterest, you know the feeling of panic you can get if you restrain yourself or you are not able to visit that site frequently. With me, I’m afraid that I am going to miss the next best thing to dyeing doilies…and guess what? I was fortunate enough not to miss this brilliant, literally BRILLIANT idea a while ago. Granted, I think this is more of an Easter-ish idea, but with St. Patrick’s Day (ie. leprechauns, pot’o’gold, green things and rainbows) I decided to try my hand at this fun concept. You can see the original post here. To begin with, I’ve been having trouble with hard boiling eggs recently. I go for ages without making them, and I somehow forget how to do them without the grey ring around the yolk. I know that is from over-cooking, but I do not remember how long I’m supposed to cook them. Sometimes I get busy and forget to set the timer or don’t get them in the cold water soon enough/long enough. So when I saw another pin on Pinterest about how to boil an egg, I added it right to my board. Here is THAT original link. It came down to this: Put your eggs in a pot and cover the eggs with cold water, plus about an
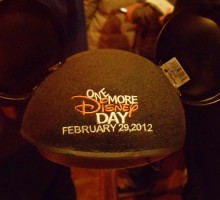
Boy…this one popped up way sooner than we expected! I remember in the old days, it was a joke for all the “unmarried” ladies that we would wonder who we would ask to marry us on Leap Day! I don’t even know if the youngsters have even heard about that one! But that’s okay…it’s still just a once every 4 years occurrence, and this year, Disneyland decided to do it up big, like Disney’s marketing team always finds a way to do – Disneyland was open from 6am on February 29th until 6am on March 1st…and NO! We did not do that! We did, however, want to be a part of the celebration, so Megan took a half day off of work and we headed to Anaheim early afternoon, anticipating a big crowd and not planning on staying too late. When we arrived, we were directed to the top level of the parking structure. I had never done that before and Megan only once before. The crowd was steady, but not too bad. We even got right onto the tram. It wasn’t until we approached the entrance that we discovered a minor problem: they were filming an episode of “Modern Family” on what was sure to be one of the busiest days of the year! Blah! There was a single-file line to ONE entrance gate that we had to stand
Guest blog spot and a another giveaway!
Beautiful to look at, but hard to carry when full!

Good morning, new day!
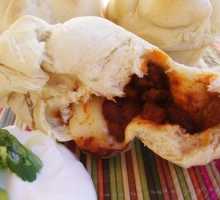
Our family seems to be on the go a lot lately and not everyone seems to be home at the same time to eat dinner together. There are occasions when a grab-and-go meal comes in handy. We would often take advantage of the freezer-to-microwave foods, but these freshly prepared, meals in a bun are wonderful when right out of the oven and just as good when reheated. To make these hot pockets of chili cheese roll yumminess, you will need a package of either Rhodes Dinner Rolls or Rhodes Texas Rolls. In addition, you will need: 1 – 15 ounce can thick chili (take it out of the can and stir it up); 8 ounces cheddar cheese (I used white cheddar), cut into 12 cubes; non-stick cooking spray, toothpicks and a 12-count muffin pan. Pretty easy, right? Spray the cookie sheet with a non-stick cooking spray; place the frozen rolls on the cookie sheet, and then cover with sprayed plastic wrap. My little trick to do this is to put the plastic wrap over the rolls on the pan, then spray the top of wrap, then take the plastic wrap and flip it over, covering the rolls with the now sprayed plastic. It is easier to see exactly how large an area it is that needs to be sprayed. Let the rolls thaw until they are room temperature. Mine actually started rising before I caught them, but they