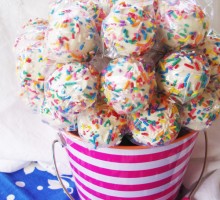
I have heard, albeit in a somewhat politically disparaging way, that one should never let a crisis go to waste. I have, in my own creative realm, decided that I will not let a good project (ie, recipe, paper art, helpful hint, etc.) go to waste. So when “Sister Friendly” (that’s me!) was trying to decide on what treat she was going to take to the Primary children yesterday, only one obstatical came my way…how do I display over 30 cake pops? They are just too cute to hide in a brown paper bag! I love finding colorful containers, especially when they’re on sale! This bucket, along with a lavendar striped one, came from Bath and Body Works. It measures 4 1/2″ in diameter on the bottom and 6 1/4″ across the top. This is a bit bigger than the ones you find in the dollar bins at Target, and the broader base helps to stabilize it. Galvinized buckets can also be found, so I’m sure you can find something similar. Here’s how I do it! Take your empty bucket and put a wad of packing or tissue paper in the bottom. I wouldn’t use newspaper because it might make your sticks dirty from the newsprint ink. This will keep the sticks going straight down and they won’t slide around. Start lining up the first row of cake pops. Keep them down, close to
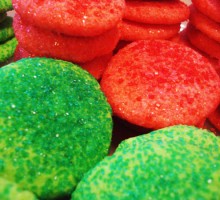
Make your Jell-O Cookies merry, just in time for you Christmas cookie plates!
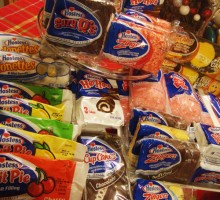
It was a sad day when I heard that Hostess was closing it’s door, laying off thousands of employees across the country and filing for bankruptcy. I hadn’t been following the company’s problems, so the whole issue kind of snuck up on me. All of a sudden I found myself in fear of never getting a SnoBall or DingDong again! So what do the Naylor’s do when pushed into a corner? We combine our efforts, shoot for the last hurrah…which of course, ends up in a whole lot of excess! That very night, Megan and I drove over to Foods-4-Less…we found one bag of chocolate Donettes. So we went across the street to Walmart – surely we would find some over there…nothing! We stopped at 2 gas stations on the way home, but no luck. So Megan had the bright idea to send a shout-out to other Naylors across the country…okay, in Vegas and Salt Lake City…to give them a mission, should they choose to accept it, to be on the look-out for any and all Hostess goodies. One thing I’ve learned – Naylor’s never back down from a challenge! I decided to make an early trip over to Business Costco and look what greeted me when I went to my car! I went down the street and had to stop… …then I went to the main street and had to stop again! When I got
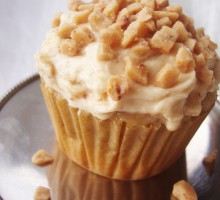
I love to bake, but I am basically a lazy baker. It has been a really long time since I baked a cake from scratch. I am not a very discriminating cake-eater. I was thrilled when I discovered that adding melted butter instead of oil to a cake mix seriously changes the texture and taste of the finished product. I can, however, recognize when I’ve eaten something good. This is a really good recipe! Thanks Amy and Pam for letting me share! Banana Cake Cake 1 1/2 cups ripe banana, mashed (about 4 – 6 medium-large) 2 tablespoons fresh lemon juice 3 cups flour 1 1/2 teaspoons baking soda 1/4 teaspoon salt 3/4 cup butter, room temperature 2 1/8 cups white sugar 3 large eggs 2 teaspoons vanilla extract 1 1/2 cups buttermilk Cream Cheese Frosting 3/4 cup butter, softened 12 oz. cream cheese, softened 6 to 7 cups powdered sugar 2 teaspoons vanilla extract 1. Pre-heat oven to 275°…yes, it is 275° – this is not a typo! Grease or spray 2 – 8″ round cake pans with baking spray and set aside; for cupcakes, put paper liners in a cupcake pan and set aside. 2. In a small bowl, mix mashed bananas and lemon juice; set aside. In a medium size bowl, sift the flour, baking soda and salt; set aside. 3. In a large bowl (or mixer bowl),
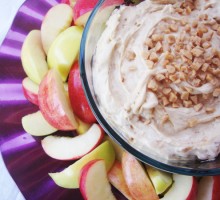
This dip is out-of-this world delicious! Enough said…or is it? I could go on and on…everyone that tries it does! One of the main reason behind serving this with apples is because it eliminates the need for utensils. Using a slice of an apple helps you get some of your daily servings of fruit in. You will learn early on that you should get a good scoop of it on each slice, since double-dipping is socially unacceptable…and yes, you will have to keep an eye on the dip – the dip-partakers might just forget their manners! You could always encourage your guests to use plates, but you might want to double this recipe or there won’t be enough to go around. If there does happen to be any left, lock the frig or it will mysteriously disappear overnight. Yep…this Heath Toffee Cream Cheese Apple Dip is THAT good! Heath Toffee Cream Cheese Apple Dip 2 – 8 oz. packages cream cheese, softened 1/2 cup white granulated sugar 1/2 cup brown sugar, well packed 1 1/2 teaspoons vanilla 1/2 a 8 oz. package Heath Toffee Candy Bits Let the cream sit out until it softens. Add the two sugars and the vanilla. Whip together until smooth and creamy. Add about 1/2 the package of the Heath Toffee bits and whip it up a little more. Chill for a few hours or overnight. This will
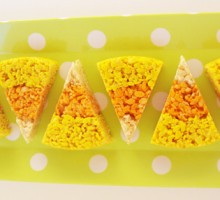
I am so excited…October is finally here! I try to put off all things Halloween until October, but once it arrives, there are so many new things to try that I have to be busy. I spied these little treats on Pinterest and knew this would be a nice and easy addition to my Halloween treat arsenal. Candy corn is one of those iconic treats that shouts Halloween, but it isn’t my favorite candy. Don’t get me wrong…I always buy it and will use it to decorate with, but eating it is a different story. It is way too sweet for my taste buds, but I love the tri-colored shape, so the possibility of using this as a replacement makes me happy! Candy Corn Krispie Treats You will need to gather the following items before you start: 1 large box of Rice Krispies cereal (at least 9 3/4 cups); 2 -10 oz bags of mini marshmallows; 1 cube (1/2 cup) butter – if you cut up the cube of butter into the portions you will need, there will be an extra tablespoon to use on your hands to press the krispie mixture into the cake pan; spray vegetable oil; yellow and orange gel food coloring (like Americolor or Wilton); 2 large mixing bowls, at least one of them microwave-safe; a wisk, a bowl scraper and a large, sturdy spoon; 2 – 8″ cake pans. For the yellow ring: 5 cups
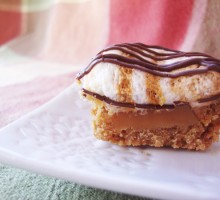
I recently did a post about S’More Bites – small, two-bite treats that are really delicious. But anytime I make something really good, I can’t seem to leave it alone. I tell myself, “Come on…you can do better!” While I try not to brag, I can’t let this one escape sharing simply because it is somewhat similar to the previous post. According to my friend Kent W., these are ridiculous! And here’s the secret ingredient… ingredients! Megan found these Chocolate & Vanilla and Caramel & Vanilla Marshmallows at the Everything99cents store. She didn’t buy a bunch because she wanted to try them first. I thought it would make an interesting deviation on the original S’More Bites. Start with the basic recipe for the graham cracker crust on the S’more Bites page. Make the crust and press it into the mini muffin pan. You can turn on your oven now to 350°; set the crusts aside. Prepare the fillings. Cut the marshmallows in half height-wise. Unwrap the caramels and cut them in half height-wise. Kitchen shears work really well to do these steps. For the candy bars (I used Hershey’s Milk Chocolate is 1.55 oz bars – have 2 or 3 on hand), break into the divided sections and then in half again. If you are using other chocolate, break into smaller chunks and set aside. You will want to do this BEFORE you bake the s’more cups, otherwise you won’t be ready when
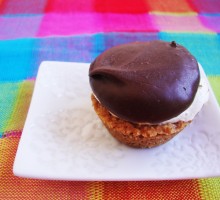
I can’t believe it! Summer is almost over and I have yet to make it to the beach. That’s right – no sandy feet, looking for shells or even much of a sunburn…and I got that at a garage sale! But there’s a church beach party coming soon and I signed up to bring a dessert. What to bring, what to bring? Then I came upon the perfect thing – S’More Bites! I have to admit that I am not much of a traditional S’More lover. Even though I love the taste of this traditional campfire treat, I have an aversion to so many unwashed hands reaching into the same marshmallow bag and the struggling to assemble them, not to mention the messy hands and faces that result while eating them. I know…I’m such a old fuddyduddy! But when I saw these little S’More Bites with the same flavors, pre-assembled and bundled up in one bite (or two), I knew that these would hit the spot, at least for me! (Adapted from the recipe at Pampered Chef.) S’More Bites 7 whole graham crackers (1 cup, finely crushed) 1/4 cup powdered sugar 6 tablespoons butter, melted 4 bars (1.55 ounces) milk chocolate, divided into sections – I decided to make these late at night and didn’t have candy bars, so I used a bag of Nestle’s Milk Chocolate Chips 12 large marshmallows, cut in half height-wise – I had Jumbo Kraft marshmallows,
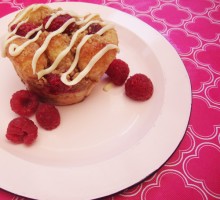
Summer is a wonderful time for fresh fruits to be incorporated into as many recipes as I possibly can. Raspberries are one of my favorites. When they are on sale I am even happier! I bought several pints of them with the intent of making jam, but when I realized that it was time for another guest blog spot with Rhodes, I knew it would be the perfect time to experiment! You can hop on over to the Rhodes Bake-N-Serv Blog to get step-by-step directions for this easy and yummy recipe…it is good enough to heat up the oven and bake, even in the summer!
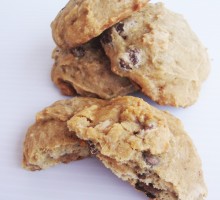
Last week, on our trip up to Utah, we stopped for the night at Jake’s house. As per Tom’s request, Jake treated us to one of his specialties…Banana Chocolate Chip Cookies! They are soooooo delicious! Lower in fat than many of our other recipes, the banana adds a delightful flavor that makes it hard to stop eating. Tom had wanted some for the trip, which Jake kindly obliged us with, but he made enough for us to pick up a few on the trip home to take home and share with Mike. The cookies are so good that I asked Jake for the recipe. He didn’t answer me in the affirmative, so I assumed that it was “top secret”…no problem, I didn’t mind. But I hadn’t gotten my fill of banana cookies, so I determined that I would go with the minor info he had given me and begin my experiment. You know what? My first attempt was a winner! Here’s the recipe. Banana Chocolate Chip Cookies 1/2 cup butter, softened 1 cup ripe bananas, mashed (How many bananas? It depends on size – I used 2 1/2 bananas) 2 large eggs 1 cup light brown sugar 1 cup white granulated sugar 2 teaspoons vanilla 1 teaspoon salt 1 and 1/2 teaspoons baking soda 4 1/2 cups flour 1 – 12oz bag semi-sweet chocolate chips In a large mixing bowl, combine the butter and