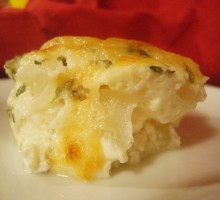
Tasty little individual servings of cheesy scalloped potatoes are perfect for entertaining or family dining!

Cinnamon Roll Pancakes with Cream Cheese Glaze fit the bill when you need a breakfast to knock their socks off!

Chunky or pureed, this hearty Creamy Tomato Rice Soup is sure to hit the spot on a chilly winter day!
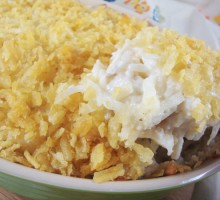
Funeral Potatoes A.K.A. Hashbrown Casserole is the perfect side-dish for any occasion!

Delicious take-out style chicken fried rice that is easy and inexpensive to make
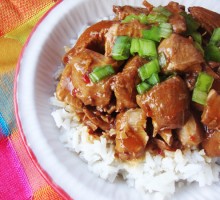
Our family really loves Asian-style food. We adore PF Chang’s, but going there usually surrounds an event like a birthday or a graduation. When time is of the essence, our favorite go-to is Pei Wei, a PF Chang fast-food alternative. Good food, reasonable prices and it’s quick. But I have been determined for a while now to start experimenting with main dishes that might satisfy our chicken and rice cravings right here at home. I came across this recipe for Bourbon Street Chicken and adapted it for a larger quantity, to be prepared in the crock pot. Bourbon Street Crock Pot Chicken Serves 8 – 12, depending on how hungry you are! 5 lbs. raw boneless, skinless chicken breast, cut into bite-sized pieces 5 – 6 tablespoons olive oil, 1 – 2 tablespoons per pan of chicken (my frying pan only cooked up about 1/3 of the chicken at a time) Sauce 1 cup apple juice 1 1/3 cup brown sugar 1/4 cup apple cider vinegar 1 teaspoon ground ginger 1 tablespoon crushed red pepper 5 large garlic cloves, minced 1 1/3 cups soy sauce 1 cup hot water 1/2 cup ketchup 1/4 heaping cup of cornstarch Combine all the sauce ingredients in your crock pot, with the temperature on high. Put the lid on the crock pot. Next, add olive oil, 1 – 2 tablespoons per pan full of chicken to a frying pan and turn

I love to bake, but I am basically a lazy baker. It has been a really long time since I baked a cake from scratch. I am not a very discriminating cake-eater. I was thrilled when I discovered that adding melted butter instead of oil to a cake mix seriously changes the texture and taste of the finished product. I can, however, recognize when I’ve eaten something good. This is a really good recipe! Thanks Amy and Pam for letting me share! Banana Cake Cake 1 1/2 cups ripe banana, mashed (about 4 – 6 medium-large) 2 tablespoons fresh lemon juice 3 cups flour 1 1/2 teaspoons baking soda 1/4 teaspoon salt 3/4 cup butter, room temperature 2 1/8 cups white sugar 3 large eggs 2 teaspoons vanilla extract 1 1/2 cups buttermilk Cream Cheese Frosting 3/4 cup butter, softened 12 oz. cream cheese, softened 6 to 7 cups powdered sugar 2 teaspoons vanilla extract 1. Pre-heat oven to 275°…yes, it is 275° – this is not a typo! Grease or spray 2 – 8″ round cake pans with baking spray and set aside; for cupcakes, put paper liners in a cupcake pan and set aside. 2. In a small bowl, mix mashed bananas and lemon juice; set aside. In a medium size bowl, sift the flour, baking soda and salt; set aside. 3. In a large bowl (or mixer bowl),
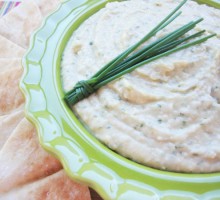
I was at a friend’s house a couple of weeks ago for a meeting, and Amy graciously served us lunch. Food is always better when someone else does all the work, but this lunch was so delicious that I asked for all the recipes…just to spread the deliciousness around! We had some toasted pita chips with this yummy bean dip, similar in flavor and texture to humus. It was so good and simple to make that we decided to make it for a women’s conference (of 200 women) that was coming up at the end of September…and I made 6 double batches! I will, however, just give you the smaller-sized recipe – technically, I could only do a double recipe batch at a time…it’s all my Cuisinart food processor would hold! Cannellini Beans, also known as white kidney beans, are high in protein, low in fat and a great source of fiber. I spotted some cans at my local grocery store for $1.69 per can, but because I was making such a large batch, I shopped around and found them at my Walmart (not a super store) and there were 2 brands of cannellini beans – one was 92¢ and the Great Value label was only 68¢. I am not picky about my canned beans…I opened one of each of the cans, tried a bean from each and couldn’t tell the difference. After all, I was

Along with the changing color of autumn leaves comes the anticipation of cooler weather…and my favorite seasons for baking! Those days haven’t quite arrived here in San Diego, but I anxiously await a good excuse to heat up the house. For those of you blessed with something other than our “horrid” San Diego climate, the time is now and this is a great recipe to add to your “fresh-out-of-the-oven” arsenal! Time again for a guest post over at the Rhodes Bake-N-Serv Blog with this fun recipe for Chopped Pizza. No red sauce, which is great for some kids, but what I really liked about it was that it makes a no-mess pizza bread that is delicious served fresh, easy to re-warm and yummy served cold! Go check out the step-by-steps and make some tonight for dinner…and extra for lunch tomorrow!
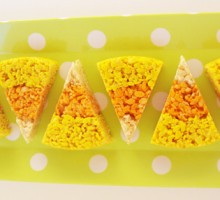
I am so excited…October is finally here! I try to put off all things Halloween until October, but once it arrives, there are so many new things to try that I have to be busy. I spied these little treats on Pinterest and knew this would be a nice and easy addition to my Halloween treat arsenal. Candy corn is one of those iconic treats that shouts Halloween, but it isn’t my favorite candy. Don’t get me wrong…I always buy it and will use it to decorate with, but eating it is a different story. It is way too sweet for my taste buds, but I love the tri-colored shape, so the possibility of using this as a replacement makes me happy! Candy Corn Krispie Treats You will need to gather the following items before you start: 1 large box of Rice Krispies cereal (at least 9 3/4 cups); 2 -10 oz bags of mini marshmallows; 1 cube (1/2 cup) butter – if you cut up the cube of butter into the portions you will need, there will be an extra tablespoon to use on your hands to press the krispie mixture into the cake pan; spray vegetable oil; yellow and orange gel food coloring (like Americolor or Wilton); 2 large mixing bowls, at least one of them microwave-safe; a wisk, a bowl scraper and a large, sturdy spoon; 2 – 8″ cake pans. For the yellow ring: 5 cups