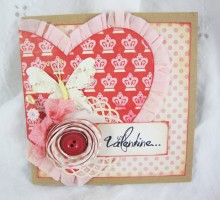
Chunky hand-made Valentine's Day cards are a fun way to share your talents with those you love!
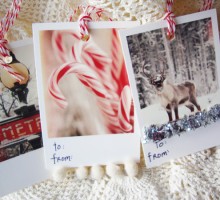
It’s the 6th day of December…Christmas time and that means I’ve got to get busy on my cards – I’m seriously behind schedule! There are always oodles of new Christmas papers, but I have been trying to cut back on my hoard of paper, while still trying to keep current with the styles. All things trend and Christmas is no stranger to change. But for this season, I’m going to try to keep it simple. In my last post, I talked about a cute store that we found at the mall – Typo. There were lots of great things that we found for gifts, but one of our favorite finds was a small tin of 50 mini Christmas-themed polaroids in a “Message In A Box”. The vintage-style photos all create a bit of nostalgia. I just love the little faded photos! The pictures aren’t complicated, so I kept the sentiments simple. I also kept the embellishments to a minimum: baker’s twine, buttons, red clothespins and old dictionary pages accentuate the photos without overwhelming the clean lines. A few small dots of glue, with glitter sprinkled on top, gives the illusion of falling “flakes” to the snowy scene. Inking the edges with black StazOn distresses and adds definition. I stapled the photos before I added the foam mounting tape to the back – the staples are just for looks – I don’t like the look of
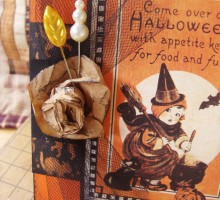
I’ve been so busy baking that I almost let today get away from me without making any cards…ridiculous! Can’t let that happen! So why not stop, take a few minutes and start getting ready for Halloween greeting cards? I couldn’t think of any good reason either. I had a couple of sheets of Graphic 45 Happy Haunting Collection and I love the nostalgic, whimsical look of the artwork, so for today it was the perfect choice for my cards! I had a cute little moon button that I tied up with some linen thread at the top! Don’t you just love the scaredy cat? Use pinking shears along the edge of a 2′ length of crepe paper; gather, put redline tape on the back and apply as a ruffle, tying up with some orange Hug Snug seam binding. It’s kind of hard to see, but I added some Star Dust Stickles to the face on the pumpkin for just a little fun sparkle! This card uses ribbon on the side and three buttons to dress it up. A little black tulle, a brown paper bag flower and some fancy pins give a nice touch! And here’s more of the little quilt in the background! If you haven’t made cards yet today, it isn’t too late! Happy Card Making!
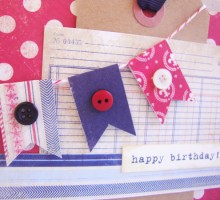
I love the 4th of July. I love the flags, the parades, the picnics and the fireworks! I love going to the flag ceremony and breakfast at our church and then stopping by our little neighborhood’s 4th celebration, where the kids decorate their bikes and have a parade. Barbeques with friends, watermelon (with seeds…it’s more fun to spit!) and corn-on-the-cob…yum! But like everything else, holidays seem to sneak up on me. No matter how hard I try to stay on top of things, they do, they just do. It seems like, and not that long ago, we eased into the month of June and now we only have one full day left! Over a month ago I saw the Authentique Glory Collection and thought, “This will be great for 4th of July cards!” Know what? I got three done…yep, only three. It’s a good thing that red and navy are good colors to have in your stash! Sorry…my camera is a little off on the navy…or maybe that’s my PhotoShop skills! It helps to break up the monotony of my more “girlie” palates. Banners are a good addition for any birthday card, and the red/white/blue palate is yet another reason to celebrate. What would the 4th be without a few stars and stripes? And the season would not be complete without a rocket bursting…right off the card! Here’s to a slower schedule and more time
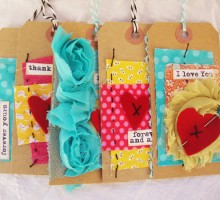
In the process of cleaning my workroom, which I seem to be constantly starting but never finishing, I came across a bag of fabric scraps from ages ago when I was making yoyos. I hate to throw things away, but I am trying to adopt an attitude of use it or toss it…I am guilty of pre-meditated scrap hoard! However, if one chooses to face their addiction, the occasional paper project might give one the justification needed to NOT completely purge the little, lingering bits of this and that…which is what I just did! The red wool piece is actually not a scrap…I think I might be able to make a few thousand hearts from the piece I have! I love the background kraft-colored tags – so neutral but nice! The big flower behind the heart was leftover from a project. I love the decorative pin! On occasion, I miss-cut a piece of lace or ribbon. Can’t throw those scraps away – it was the perfect length for this tag! What a deal – a few random scraps got used right up. Oh, if only all my the scraps were so small and usable! Now, in case you were wondering what the heck you would do with these… They make a nice touch of color to a wrapped gift, a note on a plate of cookies, and a layout or a card. If you keep them a little less dimensional, you
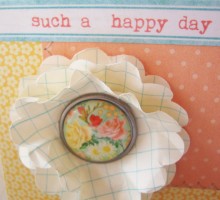
Yesterday’s post was full of fun with My Mind’s Eye, Miss Caroline, the Howdy Doody line, a link to the Matilde free font download, along with a Matilde Sentiments and Bubbles pdf for you to print and use. But there are lots more ideas for this fun line! On this card I combined a little stitching with a flower made out of a sheet of vintage graph paper. Did you notice? The center brad is out of my favorite paper design from the line. Love the crumpled flower and it is so easy! The flower (scalloped circle) punch is from EK Success. Speaking of flowers… The punches are: Scalloped flower/round – EK Success; Sunburst – Martha Stewart; twine – The Twinery. The buttons are from my big old random button jars…I’ll have to share a picture of those with you someday. I had a bunch of scraps of ribbon that go perfectly with the projects – I love using up scraps! The ribbon is from May Arts, with a little Glimmer Mist Spray. The alphabet stamp is from Limited Edition Rubberstamps and the label stamp is from PaperTrey Ink; the ink is Fluid Chalk from ColorBox. Here is the last card for today – There it is…my favorite paper from the show! I can hardly wait until I find just the right pictures to use the full 12″ X 12″ sheets of patterned paper for some layouts – but
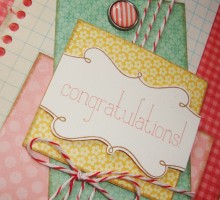
I brought home some of My Mind’s Eye Miss Caroline, the Howdy Doody collection, from CHA a couple of months ago. I have been dying to play with the line, but have been distracted by other projects that, once completed, served another purpose…like the Technicolor Deviled Eggs (for the boy’s Risk party), Jello Cookies (for a fireside) and the Cake Batter Krispie Treats (for a school bake sale). I can always use cards, but I’ve gotten quite a stash right now, so I was putting it off. Cards are about the only thing that I have room to make right now. But when I realized that I had found one of the fonts that My Mind’s Eye used on the packaging and for the embellishments, I couldn’t resist playing any longer! Don’t worry…I’ll share! Again, I am revisiting the 6″ X 6″ patterned paper pad…my favorite for making cards! I really loved the Howdy Doody line, partly because of the warm color, but mostly because of this… I do believe that this was my favorite patterned paper at the whole show! Please, don’t anyone take offense – there were dozens of collections that I will be more than happy to play with. But this one was especially appealing. Who can explain what makes you love a design? I don’t know for sure. Maybe it’s the flowers, maybe it’s the colors…whatever it is, this is so
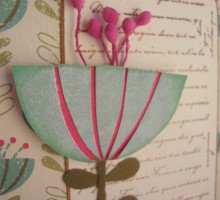
At CHA this January, I wandered into the Little Yellow Bicycle booth and caught a glimpse of their new line, Paradise…loved it! Then I got my hands on some…love it even more! Love the colors, love the texture and I really love the flower. It is always fun to have new product to play with, and I love the embellishments that are part of the Paradise line-up. I know how to make a pleated flower from scratch, but it is so easy to make one using LYB Paper Flower Kit, like the one on the above card. I also really like the embossed stickers, especially the words that are great to use on cards and layouts. Then of course, I needed to make my own flower that goes along with the line! I really do love the flower! There are some really cute chipboard die-cuts that I have around here somewhere, but I am getting ready for a scrapbooking garage sale and I seem to have misplaced them. I have layouts that are almost done…will post those another day!
Part Deux...More cards on the way for you!
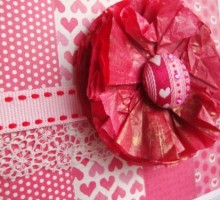
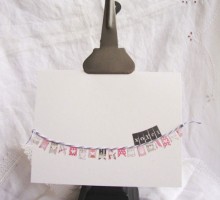
So…I suppose any time you try to do something new, there is going to be a learning curve. I have had my iPad for a year now. This year, for Christmas, Tom and Mike gave me a keyboard. It makes composing sooooo much easier! But then I was trying to figure out an easier way to post. Going directly to Typepad would only let me do html…not rich text. Then I found a Typepad app in the Apple store. Let’s see if I’m okay with how this works. Right now, all the pictures seem to end up at the bottom of the post, but for now…that will have to do. Maybe I can go to my desktop to re-arrange. A couple of posts ago, when I was crocheting hearts, I used a piece from the My Mind’s Eye “Love Me” 6″X6″ pad. Well, one project was definitely not enough. I love the whole pad. Since I’m not sure that I can separate the pictures, I will just list them! The first card was made with vertical strips of the patterned paper, and I pulled out one of my paper arts flowers out of my stash, added the K&Co. brad and a bit of ribbon and vintage lace. I left it blank so that I can choose the sentiment for the receiver. The second card is pretty simple, but I like