
It’s summertime – the college students are heading back to school and some of them are returning to college MARRIED!!! While I like to buy funny and cute cards, I do not include wedding congrats cards among those types. The pretty ones are expensive and often have smushy, drawn-out sentiments that don’t say what I want them to say. I would rather put the money into the gift, as I’m sure the recipients would agree!
Honestly, I have not bought cards in ages! Being a Scout mom, I always have those two words in my head…Be Prepared! I know that there is another wedding this weekend and since I have all the supplies out, I would rather make a few now that will be ready for a later event and put all the supplies away. (Ha, ha, ha…if that’s ever going to be possible…I mean the supplies I’m using for these cards!)
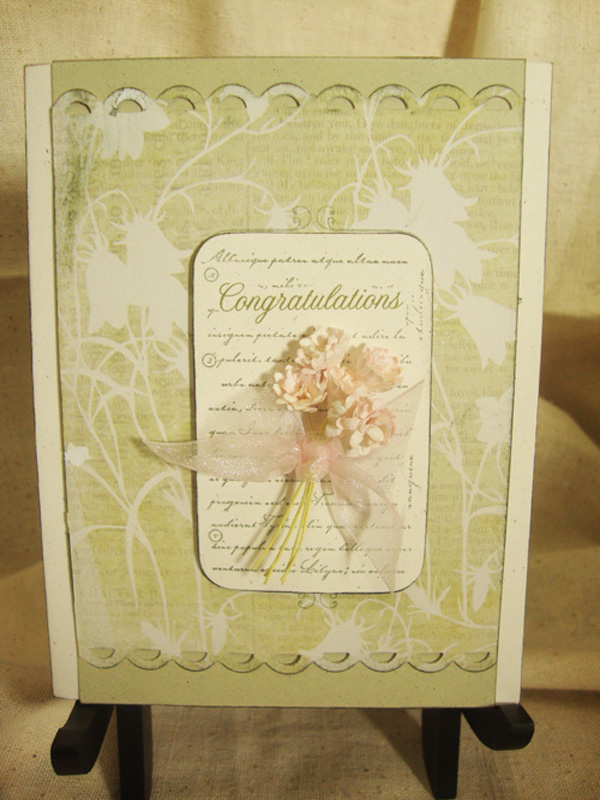
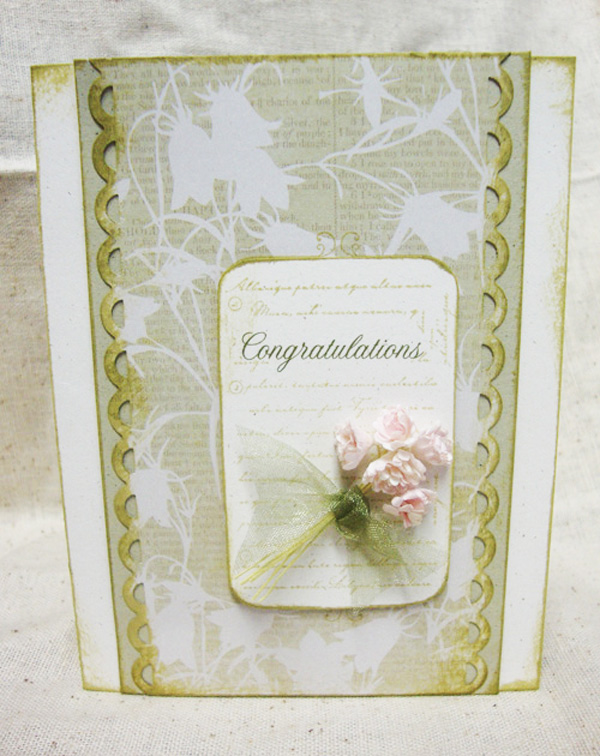
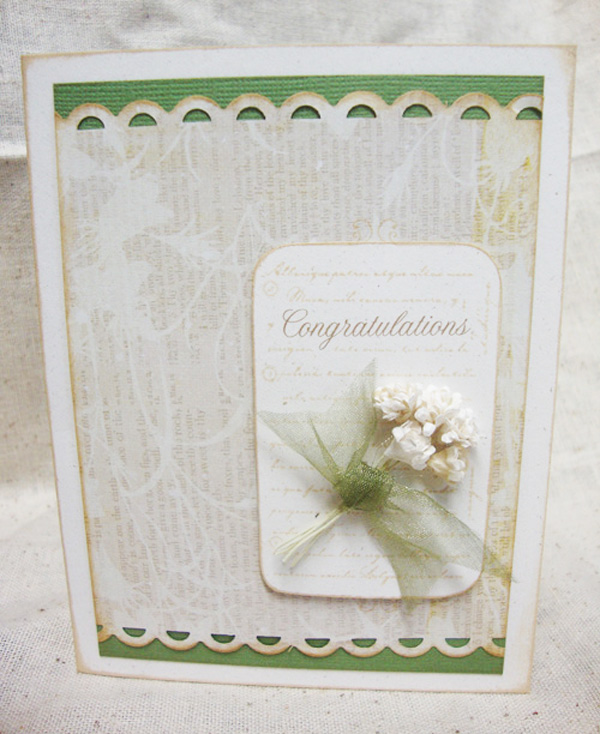
While these cards all say “Congratulations”, if the inside was left blank, you could use these for congrats of assorted uses. You could even add a generic inside text like “Best wishes on your new adventure!” That would work for a wedding, a new job, graduation or even a new baby – even though the card isn’t particularly baby-ish. These cards all use the same basic supplies but are each a little different.
This is a pretty basic card, but there are a few steps that might help you when you want to try these techniques in a different application.
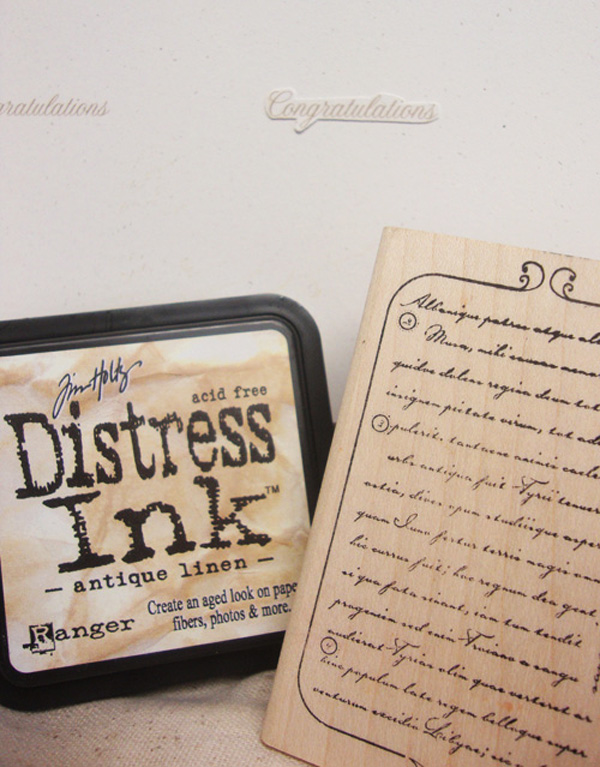
I only used one sheet of patterned paper (12″ X 12″ double-sided), four sheets of 8 1/2″ X 11″ cardstock…3 for the inside text printed and one with several of the “Congratulations” printed on the sheet, spaced so that it would allow me to stamp over the text. I’m a little on the cheap side when it comes to stamps – this comes from experience and a lot of great stamps that I use once or twice and then they get put in a drawer not to be seen for years. I can’t bring myself to buy a bunch of word stamps, especially if I think that I can come up with an acceptable font or an easy saying and I can print them on my computer. Besides, with a computer font, you can resize the text according to your design needs.
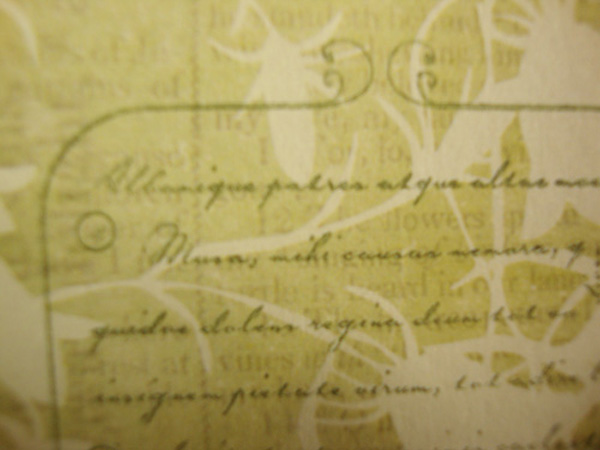
Print out your greeting/sentiment on an 8 1/2″ X 11″ sheet of cardstock, repeating the text with enough spacing to allow stamping over the text, but including an extra word on the side.
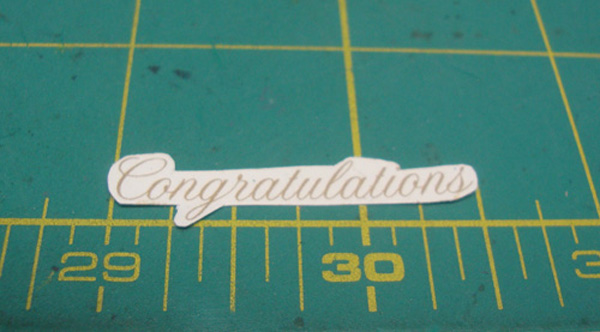
Cut out the single word, cutting close to the letters.
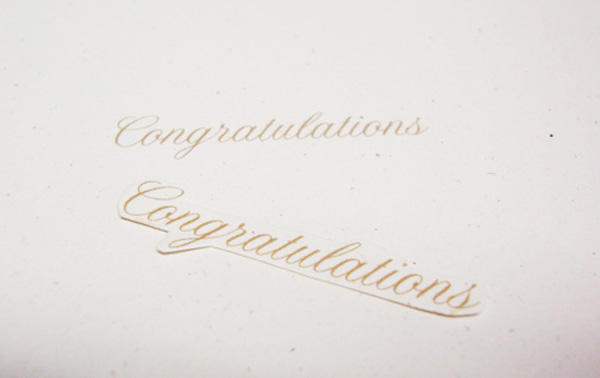
Use a little removable Dotto on the back side of the word and adhere it right over the printed word.
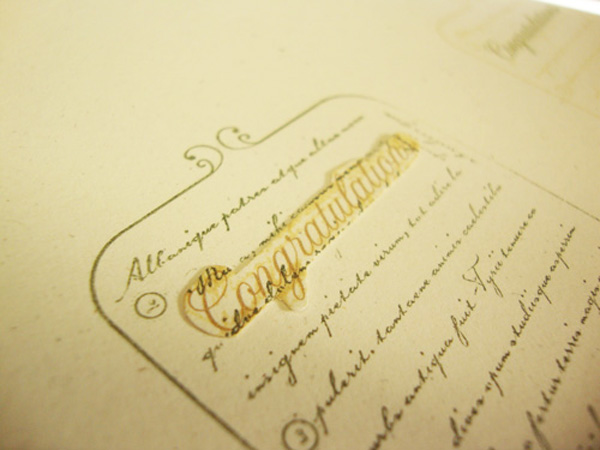
Stamp over the word. When you’re done, remove the mask. Now would be just as good a time as any to go ahead and stamp over all the greeting words.
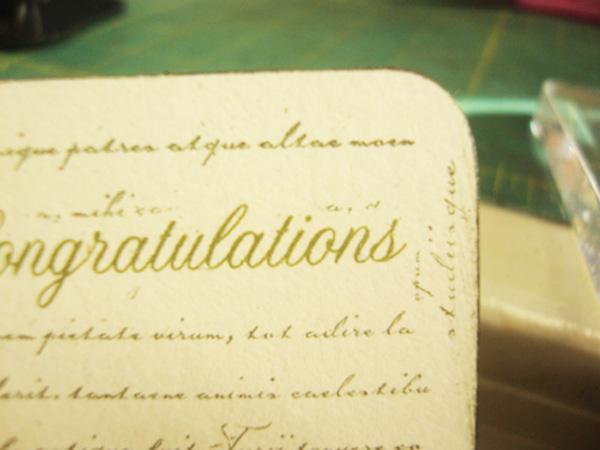
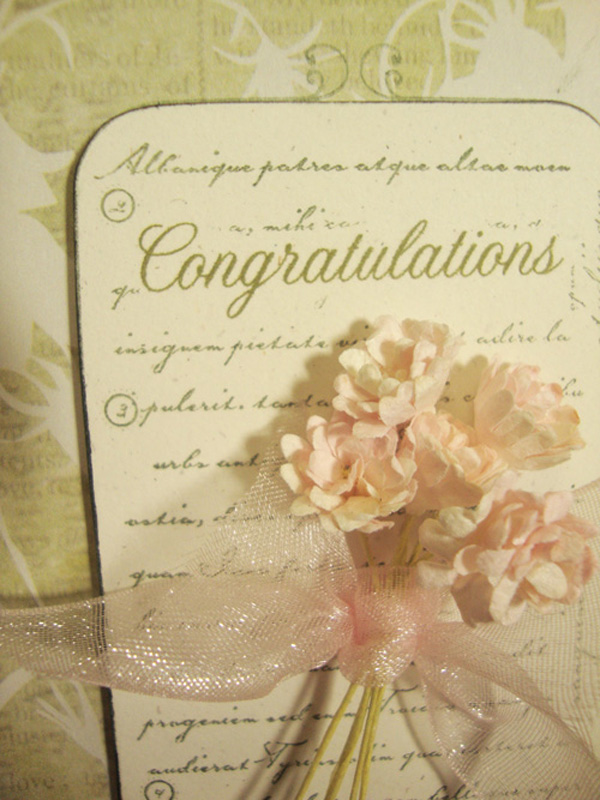
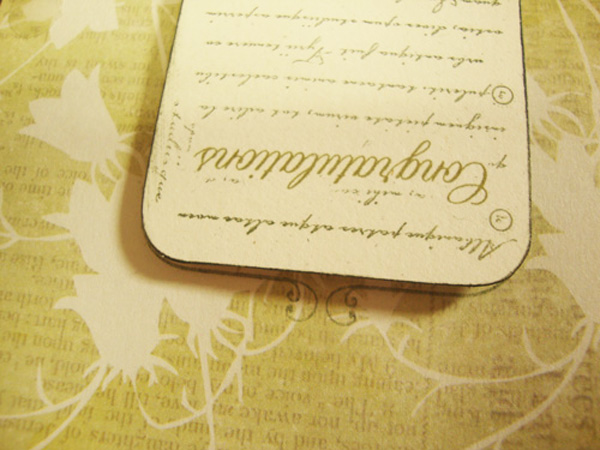
Cut out right along the outside edge of the border that is part of the stamped image; cut the curly top and bottom off. If you ink the edge with the same color ink you used to stamp, it will hide any residual white (or whatever color) cardstock…in case your cutting isn’t precise. But you need to be pretty steady when cutting. Don’t cut inside the edge. It won’t look quite as nice.
Put foam mounting tape on the back of the cut out image.
On to the patterned paper: if you keep your patterned paper strips to under 4″ wide, you will have enough of the paper to make 6 – 4 1/4″ X 5 1/2″cards. You can decide what length you want to put on the card and if you use a border punch or not. The one I used was by Fiskars. Now is a good time to ink the edges if you so desire. Once you ink and/or mat your patterned paper, you can adhere it to the card base.
Take the image stamp and stamp it onto the card.
Adhere the cut out piece directly over.
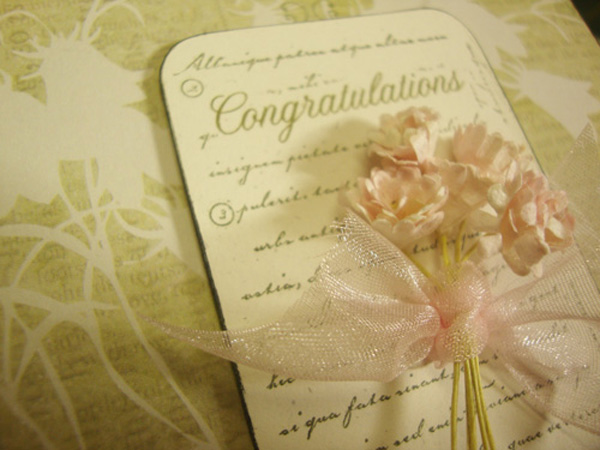
Tie 5 of the little flowers up with ribbon. Once you get them arranged, trim off the uneven bottoms. Put a medium-sized glue dot behind the flower heads and one behind the ribbon and attach to the card.
I found these cute little paper flowers when I was at Paper Tales in Point Loma this past weekend that I wanted to incorporate in the design. I just love them! I’m a little afraid that they might be all gone when I go back to the store. Don’t you hate it when you just buy a little of something and then use it up and can’t find any more!
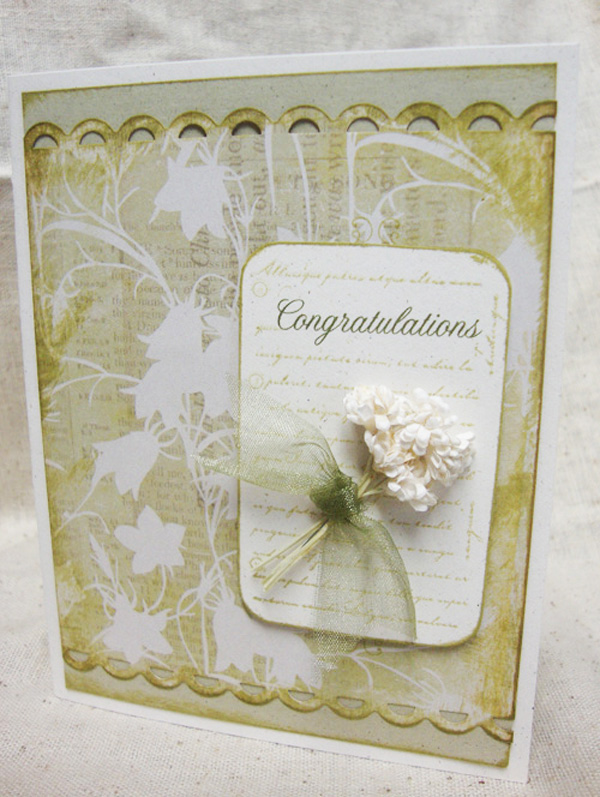
Here are a few more variations of the card.
Have fun making up some easy and pretty “Congratulations” cards. Make a bunch…be prepared!

Tags: cards with flowers, congratulations cards, masking a stamped image, Wedding cards


